


Best Way to Integrate Maschine & Ableton Live
[su_youtube_advanced url=”https://www.youtube.com/watch?v=wmjeLqEftCo” showinfo=”no” rel=”no” modestbranding=”yes” https=”yes”][su_video url=”https://www.youtube.com/watch?v=Fjb4U-cUGSE”][/su_youtube_advanced]
Another student question video is up. For this one we also added a blog post so we can give you a step by step on how to set it up.
Maschine is a very powerful sequencer but if you are an Ableton Live user it might be a somewhat complex to set them both up to work in best way.
[divider style=”clear”]
Multi-Out From Maschine
- First load Maschine to an empty audio track. Load a Drum Kit or make your own.
- Then switch to the Maschine’s mixer.
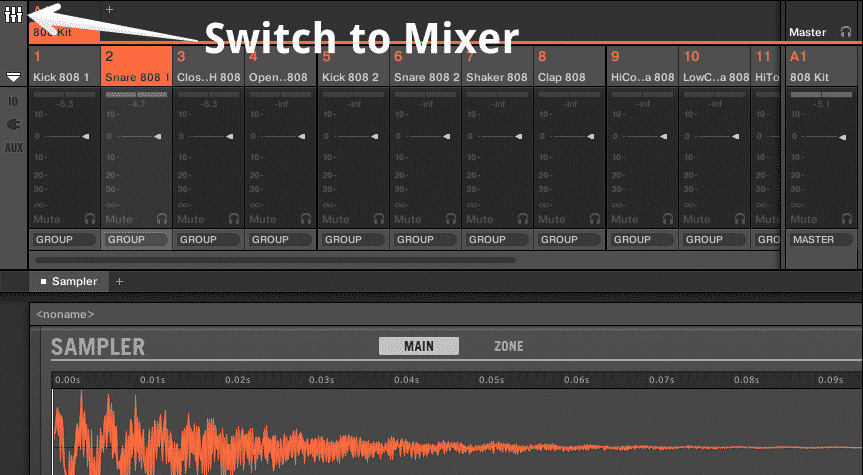
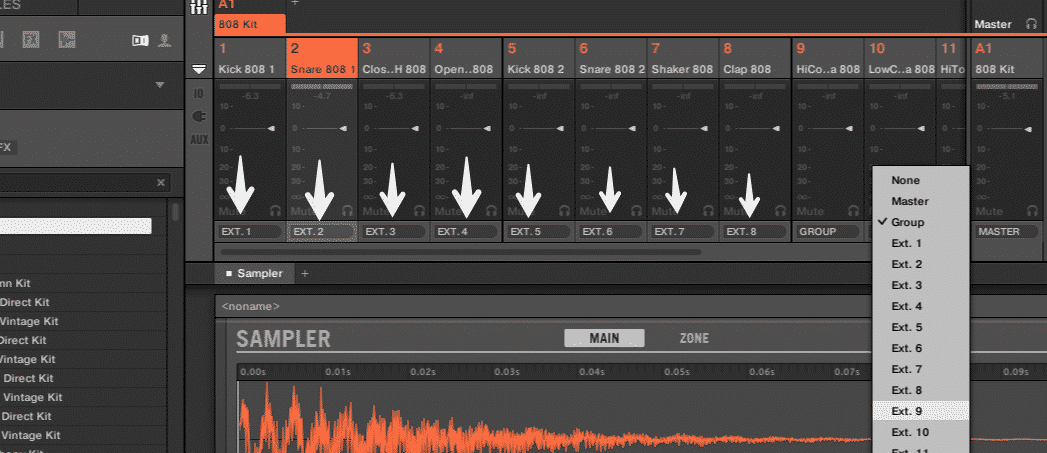
3. From here you can start routing each Pad to it’s own Ext. output.
4. In Ableton Live, Open 15 new Audio Tracks and select all of them by holding shift.
5.Change “Audio From” to Maschine and set the monitor to In
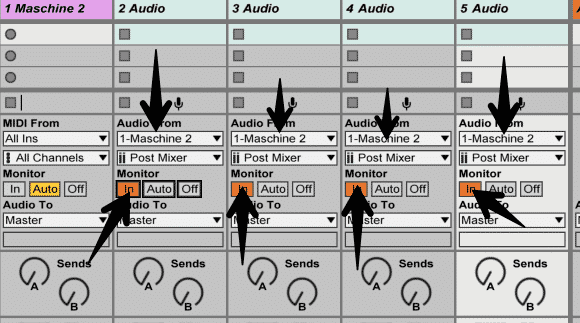
6. Finally select the correct Maschine output for each track. (You will have to do it separately for each track)
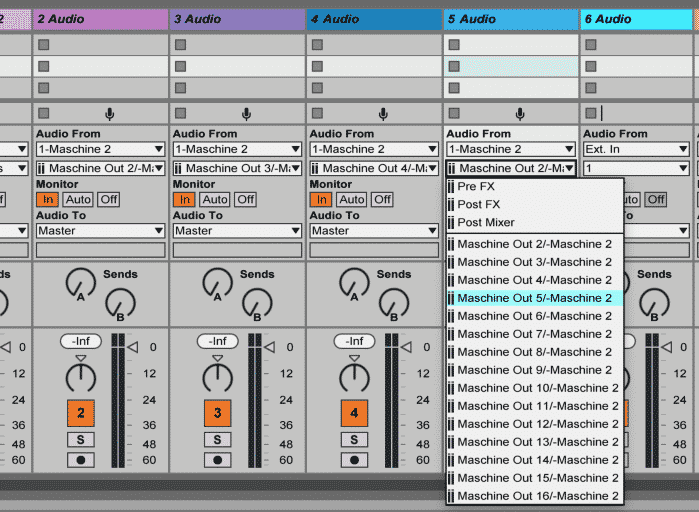
Now each pad of Maschine is routed to a different track in Ableton Live. You can add which ever Ableton Effects or Plugins you want to each track.
Check out the bottom of this page for a free Maschine Ableton Template.
[divider style=”clear”]
Maschine as a Sound Module
If you want to take it a step further and also sequence Maschine from Ableton Live using MIDI clips you will need a few extra steps.
- After you set up the routing in Maschine click on Group and select the Group Routing. Next select the MIDI tab and turn on MIDI.

2.group the Maschine into an Instrument Rack
3. Load a Drum Rack to the Instrument Rack
4. Load an External Instrument to the Drum Rack and set “MIDI To” the track loaded with Maschine.
5. In the External Instrument set the Audio From to the correct output of Maschine
6. Copy the External Instrument to a different pad and set a different out
7. Continue for all 16 pads
With this technique you can also add what ever audio (and MIDI!) effects you want into each pad of the drum rack.
Now you can also sequance maschine using a regualr Ableton Live MIDI clip. You can rename each Drum Rack pad with it’s own name to be displayed inside the MIDI clip.
VERY IMPORTANT
As of now Maschine won’t let you save only the mixer settings. That means when you load a new group the mixer routing will be reset so if you are setting up a kit to work in Ableton save it as a group preset!!!!
Or you can use the empty group template we provided.
Check out the bottom of the page for a free Drum Rack Maschine template
[divider style=”clear”]
Maschine Group Preset, Ableton Project Template & Drum Rack Template
[ulp id=’ejexOPAXoLu3OhhR’]
[divider style=”clear”]
Check out other student questions videos or submit your own question GO HERE.
Featured Masterclass


1 responses on "Best Way to Integrate Maschine & Ableton Live | Student Questions"