
EboSuite – Next Level Video in Ableton Live
This week we’ll take an in-depth look at an amazing video manipulation plugin called EboSuite. EboSuite is a suite of MaxforLive devices that you can use to edit, cut, and manipulate video within Ableton Live. Technically it is operated through MaxforLive devices but the actual application runs outside of Ableton Live. This genius tactic is what makes is so darn useful in avoiding the common fallbacks of MaxforLive and video. Most MaxforLive video devices give you the fun ole’ start-stop-start-stop clunkiness we’ve grown to love but EboSuite bucks that trend.
In this article, we’ll run through the initial steps of setting up video with the plugin, then cover the large swath of devices and FX you can use with it. Read below!
[su_divider top=”no” divider_color=”#d2d2d2″ size=”1″]
[su_box title=”EboSuite Rating: 9.5/10″ style=”glass” box_color=”#333333″]
[su_row] [su_column size=”1/2″]
Pros:
– Easy to use
– Huge list of FX devices
– Relatively low CPU usage compared to other M4L video software
[/su_column] [su_column size=”1/2″]
Cons:
– Cannot export video with effects internally
[/su_column]
[su_divider top=”no” divider_color=”#d2d2d2″ size=”1″] Get your copy from the EboSuite website for $143 US dollars here. [/su_row]
[/su_box]
[su_divider top=”no” divider_color=”#d2d2d2″ size=”1″]
Setting Up Video with the eConvert Device
Setting up video for EboSuite is pretty easy, but for the faint of heart, this is where we come in. We’re here to help you through your journey. Once you’ve done it two or three times you’ll get the hang of it! Due to the nature of EboSuite and Live’s respective coding, the developer recommends using videos format for Hep codecs. What the Hep is that? (ha, punny). Hep codec is a video format that works especially well for live triggering and manipulation. You may be thinking, “well I don’t film in Hep codec, who are these crazy people!” Don’t fret, EboSuite comes with everything you’ll need.
Cue eConvert. eConvert is the M4L device you will use to convert your more common codecs (H264, ProRes, MPEG-4, DV and Photo-JPEG,etc.) to Hep codec. It’s a breeze to use. There are 3 ways to load video into the converter. First things first, simply load an instance of eConvert onto an audio track. Then, you can drag and drop a video into it. Or you can drag a video/clip from the arrangement view and drop it into the device. Finally, the third option is to highlight a clip or section of a clip from arrangement or session view, then click “convert selected clip” button on the eConvert device.
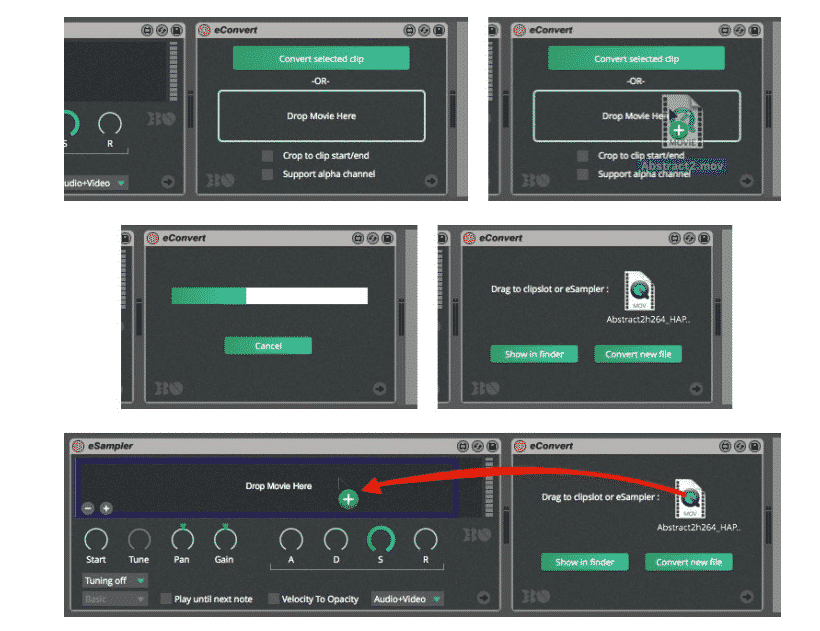
Once you’ve converted a video, open up an empty track and load eSampler or eClips depending on which view you are in. We will give more details about which to use later on. We will mention that if you have a large selection of videos you want to convert you will need to use a third-party batch converter. Once you have a video chosen, drag the file onto one of those devices and you’re ready for the next step – adding effects.
[su_divider top=”no” divider_color=”#d2d2d2″ size=”1″]
eSampler
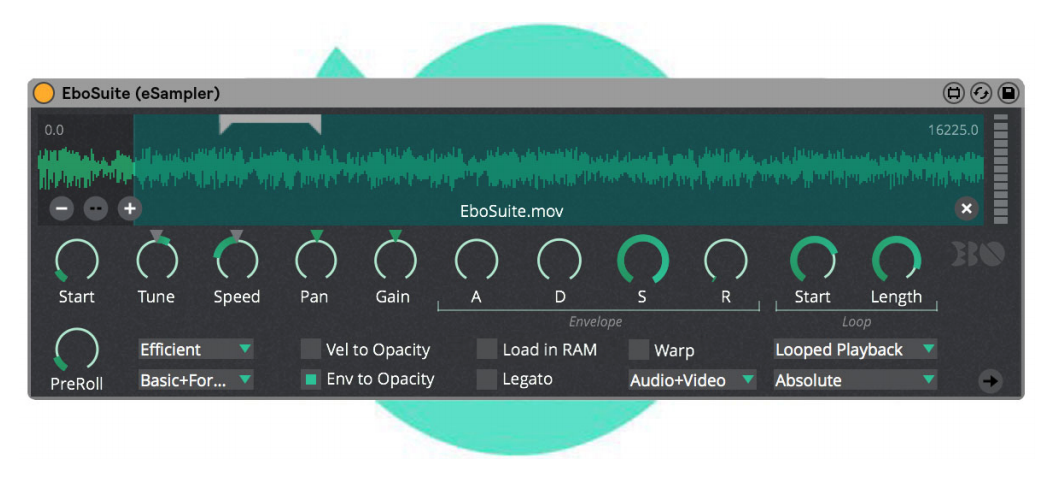
eSampler is a fully functional video sampler MxforLive device. It will be one of the main devices you use in this pack to trigger video playback with your MIDI information. As we went over in the previous section, importing video into the device can be accomplished via four different paths. Drag and drop from your finder, browser, MIDI clips, or directly from the eConvert device.
The eSampler works very much like Ableton’s Sampler, perhaps with fewer modulation abilities (that’s where the eFX devices come in). It has an ADSR linked to the video opacity that is very useful, for example, if you want to sync it more closely with the triggering sound. If you have a pad sound that the video is linked to then you may want a smoother attack and decay versus a kick sample with an immediate attack.
You can adjust start time of the clip, the pan of the video’s audio if you choose to keep it, and the gain as well all from the device. A really clever feature is the PreRoll dial where you can choose to have a video clip being playback before the trigger is fired. This will ensure smoother attack opacity. Look next to that dial for the Pitching and Tuning modes.
The Pitching and Tuning modes at the bottom left will alter the audio playback of your video sample. The most interesting is Granular. There you have a fully functional granular synthesizer within the device. You can alter and playback the video sample’s audio in grains and dip into some fun sound design. Watch the video below for a more in-depth tutorial.
[su_vimeo url=”https://vimeo.com/300527530″ width=”780″]
[su_divider top=”no” divider_color=”#d2d2d2″ size=”1″]
eSimpler
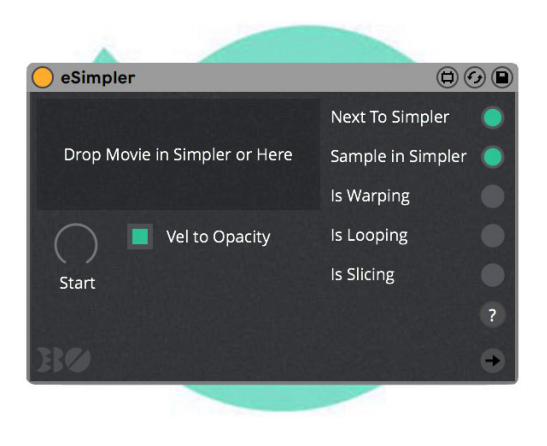
If the eSampler is too much for you, don’t worry, you can use the eSimpler. The eSimpler is a minimal device that makes video sampling simpler, and use less CPU. If you are just looking to trigger video with minimal control over the ADSR then eSimpler is your first stop. If you still want to use the audio from your video sample then you can load it into an Ableton Simpler and connect the two devices.
Load an instance of Simpler and drag the video clip into that instead of eSimpler. Now you can use Simpler to affect your audio clip. together they will carry a lighter CPU load than the eSampler device. This is a great option to use if you need a low-maintenance option for triggering video.
[su_divider top=”no” divider_color=”#d2d2d2″ size=”1″]
eVideoIn
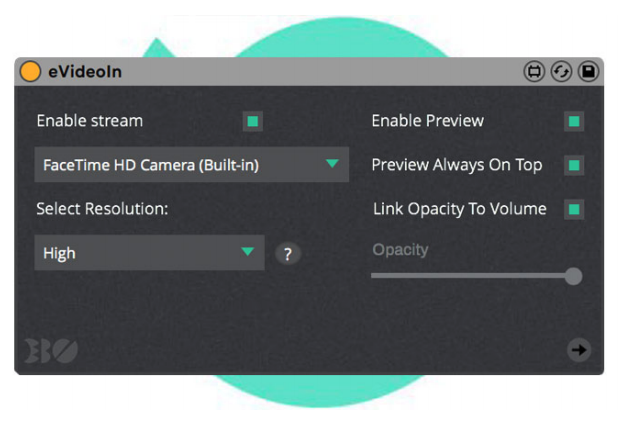
This device allows you to insert the live video signal from a camera into your video mix. Place the device on your track and choose the stream source. Enabling the preview allows a preview window to pop in showing you the Pre-Fx video stream.
Unlink the Opacity to volume and you can change the static opacity level. This is great for integrating some live video of a performance, an audience, etc. Once you’ve loaded in a camera feed you can add some effects devices. The first we’ll go over is eTransform.
[su_divider top=”no” divider_color=”#d2d2d2″ size=”1″]
eTrackTransform
eTransform is one of the first devices you may want to use to arrange your video clips in EboSuite. Use eTrackTransform to increase/decrease the size of the video image and rotate it. Toss it onto a track start playing with the X and Y parameters to move your video image around.
This is great for shifting your images around especially if you have a few video layers.
[su_divider top=”no” divider_color=”#d2d2d2″ size=”1″]
eBlend

eBlend can be used to blend video tracks together. Select the blend mode to do so. There are nine blend modes total which will each blend layers accordingly. If you have any experience with Adobe Photoshop, Premiere, or other editing software you may recognize the blend modes.
[su_divider top=”no” divider_color=”#d2d2d2″ size=”1″]
eCrossfade
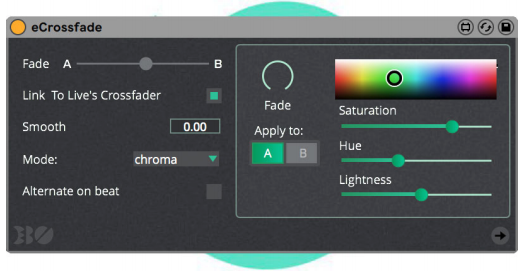
eCrossfade is a device that will utilize Ableton Live’s crossfade capabilities. Set a video track either to A or B and then use the crossfader to mix between images. You can link the device to ableton’s native crossfader if you like as well. Onboard you have some minor color adjustment tools and modes to choose between. Experiment with them to your liking.
[su_divider top=”no” divider_color=”#d2d2d2″ size=”1″]
eFeedback
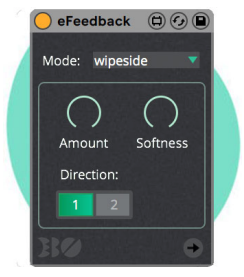
eFeedback is by far one of the coolest effects devices in the bundle. What does it do? It creates a video feedback loop within your project. Place it on the master track to affect your whole mix or throw in on individual tracks to just experience singular events.
There are ten feedback modes to switch between, listed below. We like all of them except for Additive and Multiply which only washed out the images for us.
– Xfade (Default)
– Xfade inv
– Additive 41
– Multiply
– Difference
– Difference inv
– WipeSide
– WipeMid
– WipeCircular
– WipeVertical
[su_divider top=”no” divider_color=”#d2d2d2″ size=”1″]
ePoly
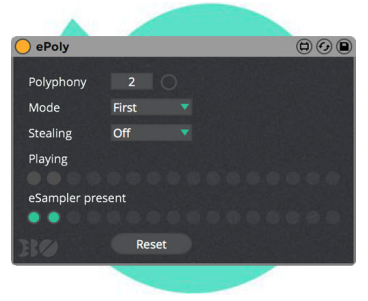
ePoly is a neat plugin that allows you to play multiple eSamplers at once from a single MIDI track. How does it work? Once placed on a track, it will then search for any eSamplers placed on MIDI tracks to the right of the control track (imagine we are in Session View).
This is useful for playing polyphonic and polyscopic (multiple video layers) at once from a single keyboard. Watch the video below for a more in-depth tutorial on how to use this device.
[su_vimeo url=”https://vimeo.com/300527625″ width=”780″]
[su_divider top=”no” divider_color=”#d2d2d2″ size=”1″]
eComper
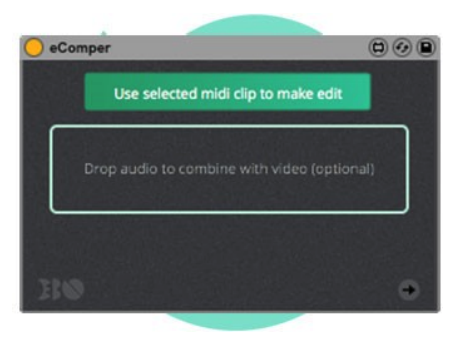
eComper may not be the most used device but it certainly is useful. Use this device to consolidate a MIDI clip to a video file.
[su_divider top=”no” divider_color=”#d2d2d2″ size=”1″]
eFX

eFX includes thirty-three effects devices, all listed below with their respective abilities. The device descriptions are provided courtesy of the EboSuite user manual, we added some notes on ones we found particularly fun.
– Bend – bend / creative distort effect
– BlockBlur – diffuse the image
– BrCoSa – change brightness, contrast and saturation
– BulgeTwist – creative distort effect
– Chroma – make a color range transparent
– Crop – remove the outer parts of the image
– Crosshatch – creative distort effect
– DanPix – creative distort effect
– Edge – add contrast to sharp color changes in the image
– Fade – manipulate the alpha channel of the image
– Glutch – creative distort effect
– HSBShift – manipulate the color range / creative distort effect
– HueRotate – manipulate the color range
– HueSat – manipulate the saturation level
– Kaleido – mirror and repeat parts of the image to create symmetrical patterns
– Kaputt – creative distort efect
– Levels – move and stretch the brightness levels of the image histogram
– LoFi – creative distort efect
– Median – average the colors in the image
– Noise – creative distort effect
– OneHue – focus on one color in the image and manipulate this color
– Pointilize – convert the image in a set of black and white points 31
– Polygonize – creative distort efect
– RGB – adjust the red, green and blue channels
– RGBShift – position and scale the red, green and blue channels
– RotaZoom – tile and rotate the image
– Shape – generate an image mask and adjust the alpha, red, green and blue channels of the area outside the mask
– Shine – make the image glow
– SineThreshold – creative distort efect
– Slitscan – creative distort efect
– Slitsglow – creative distort effect, especially useful for high contrast images
– Wave – wave / creative distort efect
– WaveGlass – creative distort effect
[su_divider top=”no” divider_color=”#d2d2d2″ size=”1″]
eFX-ISF
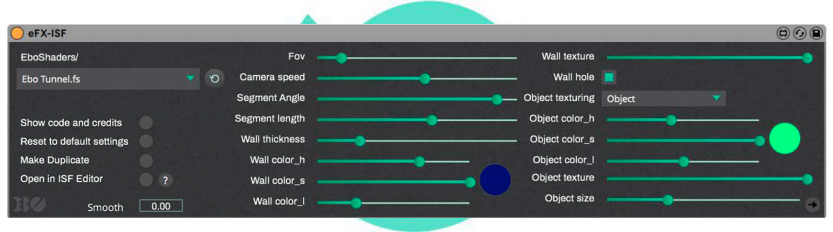
One of the most fascinating devices in this bundle is the eFX-ISF device. This device enables you to use ISF Shaders in your set. If you are scratching your head at this moment because you’ve never heard of ISF Shaders, you’re not alone! Until now neither had we. This is an extremely exciting technology to dive into, and there are thousands of free presets you can throw into the device for use right away. Below is a description from the creators and development team of the software.
ISF stands for “Interactive Shader Format”, and is a file format that describes a GLSL fragment shader, as well as how to execute and interact with it. The goal of this file format is to provide a simple and minimal interface for image filters and generative video sources that allows them to be interacted with and reused in a generic and modular fashion.
ISF is nothing more than a [slightly modified] GLSL fragment shader with a JSON blob at the beginning that describes how to interact with the shader (how many inputs/uniform variables it has, what their names are, what kind of inputs/variables they are, that sort of thing). ISF isn’t some crazy new groundbreaking technology- it’s just a simple and useful combination of two things that have been around for a while to make a minimal- but highly effective- filter format.
So now that you know what you’re dealing with its time to try some out! First, add the device to your track. Then you can choose from the dropdown menu from a number of stock ISF Shaders. There are a variety of parameters that go with each different shader, simply too many to cover, so just play around and bask in the trippy visuals. If you ever want more, visit the ISF website here to choose from and download incredible presets.
Watch the video below for a more in-depth tutorial on ISF Shaders and their role in the EboSuite device.
[su_vimeo url=”https://vimeo.com/331464906″ width=”780″]
[su_divider top=”no” divider_color=”#d2d2d2″ size=”1″]
eSyphonOut

eSyphonOut is the device you use to stream video to another video program. Instances of when you’d want to use this would be if you were doing a live stream, or if you wanted to record the video output. It is a very useful plugin to have, though we wish there was built-in video exporting.
Place it on a track, name the stream, and it should be accessible in other video platforms. Sometimes this will cause the video output to be flipped so click the button “Vertical flip texture” in that case. This device can send video to software like OBS, Syphon, etc.
[su_divider top=”no” divider_color=”#d2d2d2″ size=”1″]
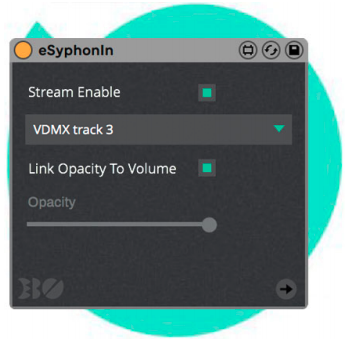
eSyphonIn does the opposite of eSyphonOut, as you could imagine. If you want to stream video into Ableton and through EboSuite’s effects then you must utilize this device.
[su_divider top=”no” divider_color=”#d2d2d2″ size=”1″]
eOutput
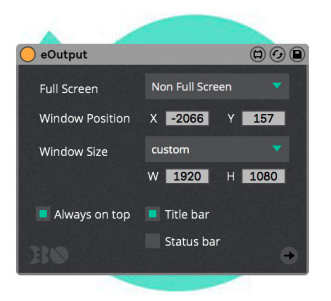
eOutput is used to resize the EboSuite video window. It is a bit of a redundancy because you can already resize the window via its corners, but, it’s convenient to have next to your other devices within Ableton. Also, you have the option of hiding the Title and Status bars so that is nice.
[su_divider top=”no” divider_color=”#d2d2d2″ size=”1″]
eDecollect
eDecollect is a debugging device for EboSuite. If you happen to click the ‘collect all and save’ button then EboSuite may not load properly upon start. Use the eDecollect button to alleviate this.
Toss the device onto a new project track, then drop the .als file you want to fix onto the device. This will create a copy with the addition of ‘decollected’ onto the .als file name. All good!
[su_divider top=”no” divider_color=”#d2d2d2″ size=”1″]
Conclusion
After all of these devices, there are still the 33 effects listed above you can use which we didn’t go into detail about. We tried them all, and are amazed at what we’ve seen. At the end of the day, you will be amazed too. We would highly recommend this software if you are interested in the crossover of video sampling and music.
Featured Masterclass


0 responses on "EboSuite - Next Level Video in Ableton Live"