

[su_youtube_advanced url=”https://www.youtube.com/watch?v=98dLKR6XoPA” showinfo=”no” rel=”no” modestbranding=”yes” https=”yes”] [/su_youtube_advanced]
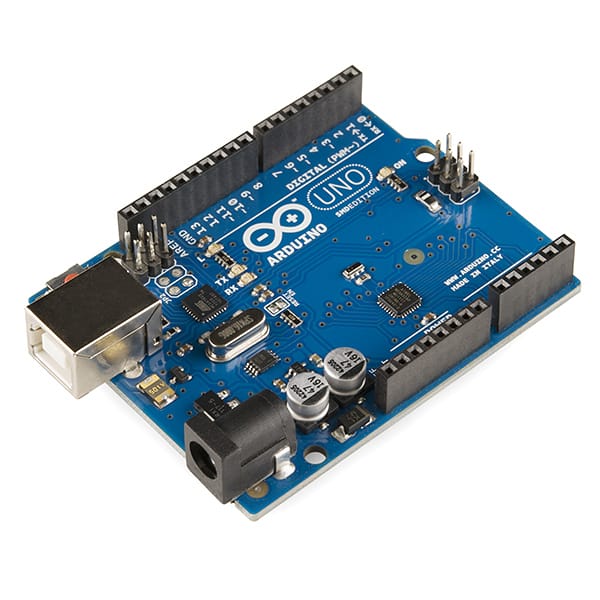
What is Arduino?
Arduino is a Micro Controller which lets us connect many types of hardware gear like LEDS, Motors, Knobs, Faders, Sensors (proximity, humidity, light etc) and even Touch screens. We can then use the computer to program the Arduino to control or react to the connected hardware in any way we want. The possibilities are endless.
There are many types of Arduino boards with different capabilities. For this video we are using the Arduino Uno R3.
Check out this list of cool Arduino projects.
- LED Cube
- Auto Lacing Shoe
- The Eye Writer
- Twitter Mood Light
- Secret Knock Detecting Door Lock
- Turn Signal Biking Jacket
- And many more!
You can find the Arduino in most online and retail electronic stores like:
But for the Arduino to do what we want it to do we need to program it using the free Arduino software.
This requires some programming knowledge and an understanding how the Arduino environment work and how you can take advantage of different boards and libraries.
Fortunately we don’t really need to know any programming when using the new Connection Kit.
[divider style=”clear”]
Programming? No Need Thanks to Ableton
Ableton has released the Connection Kit. A free collection of Max for Live Devices that lets us communicate with different types of hardware like Little Bits, Lego Brainstorms, Leap Motion and of course Arduino.
This allows us to communicate with all those great development environment using only Ableton Live and Max for Live.
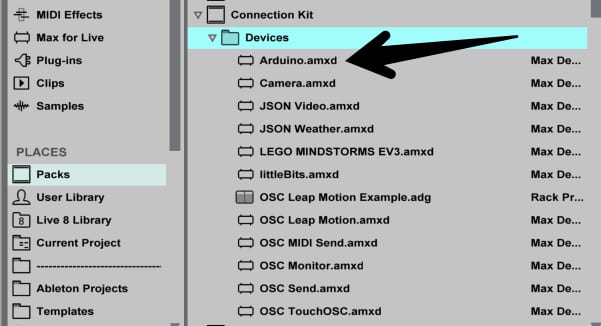
Setting up the Arduino in Ableton Live:
- Make sure you have Max for Live installed
- Install Connection Kit
- Connect the Arduino to the Computer through USB
- Run the Arduino Software
- Under tools in the top menu make sure the Arduino Uno is selected under Board.
- Then again under tools -> port select the Arduino (USBmodem)
- Go to Files -> Examples -> Firmata and select Standard Firmata
- Click the upload button to upload the sketch to the Arduino
- That’s it now you are ready to control the Arduino with Ableton Live!
[divider style=”clear”]
Using Motors with Arduino
There are different types of motors for different types of applications. We are going to use the Servo Motor which allows you to spin the head by 180°. This is great for building a drum robot to mimic the movment of our wrist.
Servo motors comes in different sizes. For this demo we are using a micro servo like this one.
Servo motors come with three wires.
- Brown to Ground
- Red to 5V
- Yellow to a Digital input with a ~ next to it. In the video we went with number 9.
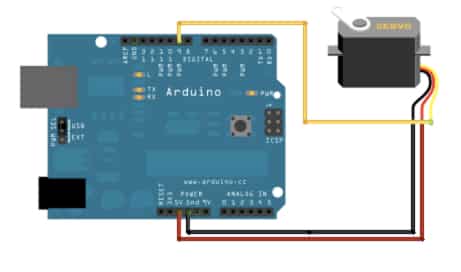
You can then attach a drum stick or even a small pen to the servo using glue, zip ties or any other way you can think of.
For this servo we don’t need an external power source as the Arduino can handle it through USB. But if you want to use bigger more powerful motors you might also need an external power source like batteries.
[divider style=”clear”]
Sequencing a Motor from Ableton Live
In Ableton Live, Load the Arduino Max for Live device under the Connection Kit Live Pack.
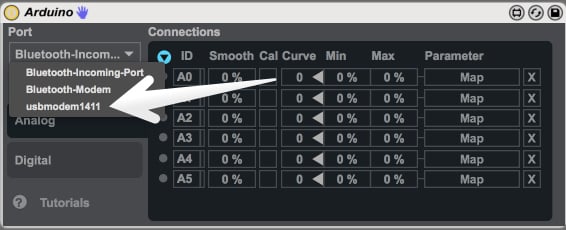
Connect the Arduino to the computer and select the port (USBmodem)
Load an Empty Audio Effect Rack and open up the Macro Controls
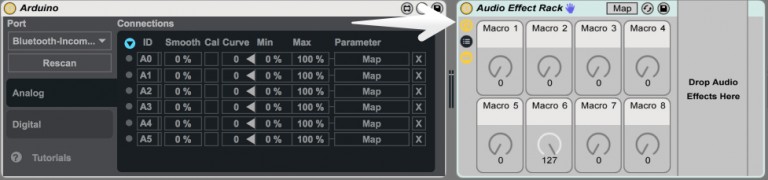
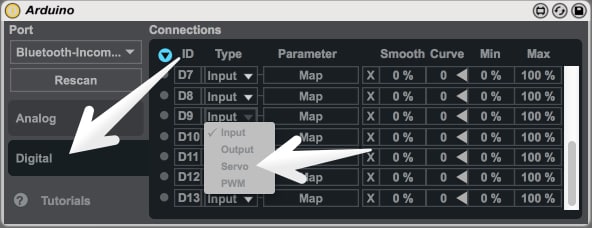
On the Arduino Device switch to the Digital tab and change the Digital input you are using (D09 in this example) for the motor to Servo.
Then, Map the D09 to the first Macro on the Audio Effect Rack
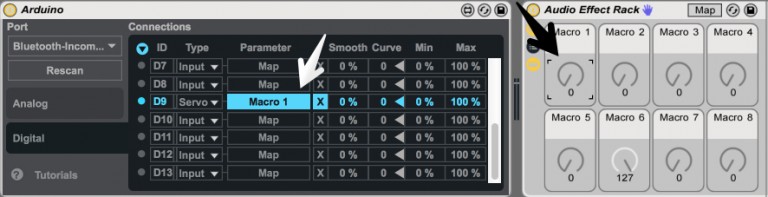
Now you can move the Macro to control the Servo. But we want to use MIDI clips to sequence the motor so there are a few more steps.
Load a sample into a Drum Rack (or a single Simpler) like a clap or a kick. Then load the Envelope Follower(Max for Live Essentials).
Now every time you play the sample the Envelope Follower creates an envelope. Now map the Envelope Follower to the same Macro on the Audio Effect Rack we mapped the Arduino to. In other words the empty audio effect rack 1st Macro should have both the Envelope Follower and Arduino mapped to it.

We now have a working drum robot we can sequence from MIDI clips. You can change the gain on the Envelope follower to control how much spin the motor have. Adjust that to your needs.
Attach a drum stick to the motor and mount it where ever you want. On real drums or controllers!
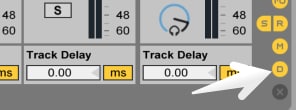
You might also stumble upon latency issues. This can be solved with the track delays.
[divider style=”clear”]
Have you build something with the new connection kit? Please share with us in the comments.
Featured Masterclass


0 responses on "How to Build a Drum Robot - Ableton Connection Kit"