
Human After All? – 3 Ways to Humanize Your Music
The beauty of electronic music is that anybody with a laptop can be a one-person band, but far too often we are stuck in the grid and our music loses its human element. The beat is not quite locking in a rhythm so you quantize but now it’s too stiff and robotic so you readjust, then requantize, then throw your computer on the ground and call it a day. If you’ve ever found yourself following a similar routine then we have a few tips on what to do in order to add the humanity back into your music.
[su_divider top=”no” divider_color=”#d2d2d2″ size=”1″]
#1 Velocity
Subtlety is the name of the game when automating Velocity as our brains are extremely tuned to feeling variations in volume. If you want more movement in your drums then add this effect to every piece, set the Out Hi and Out Lo near to the desired velocity level so it sits nicely in your mix, then bump up the Random knob a few notches. Doing this will add or subtract whatever number you chose to the velocity of your instrument instantly giving it the spaztastic feel of a live drummer. Make sure to go suuuuuper light on the random knob if you decide to add this to your kick and snare because those are usually the driving forces of the groove.
Automating the velocity of your chord progressions is equally important for keeping the feels alive, especially if you are typing everything in. A piano player will never play the same progression exactly the same way each time, utilize the same technique used on your drums to randomize your chord velocities.
[su_divider top=”no” divider_color=”#d2d2d2″ size=”1″]
#2 Sample Offset
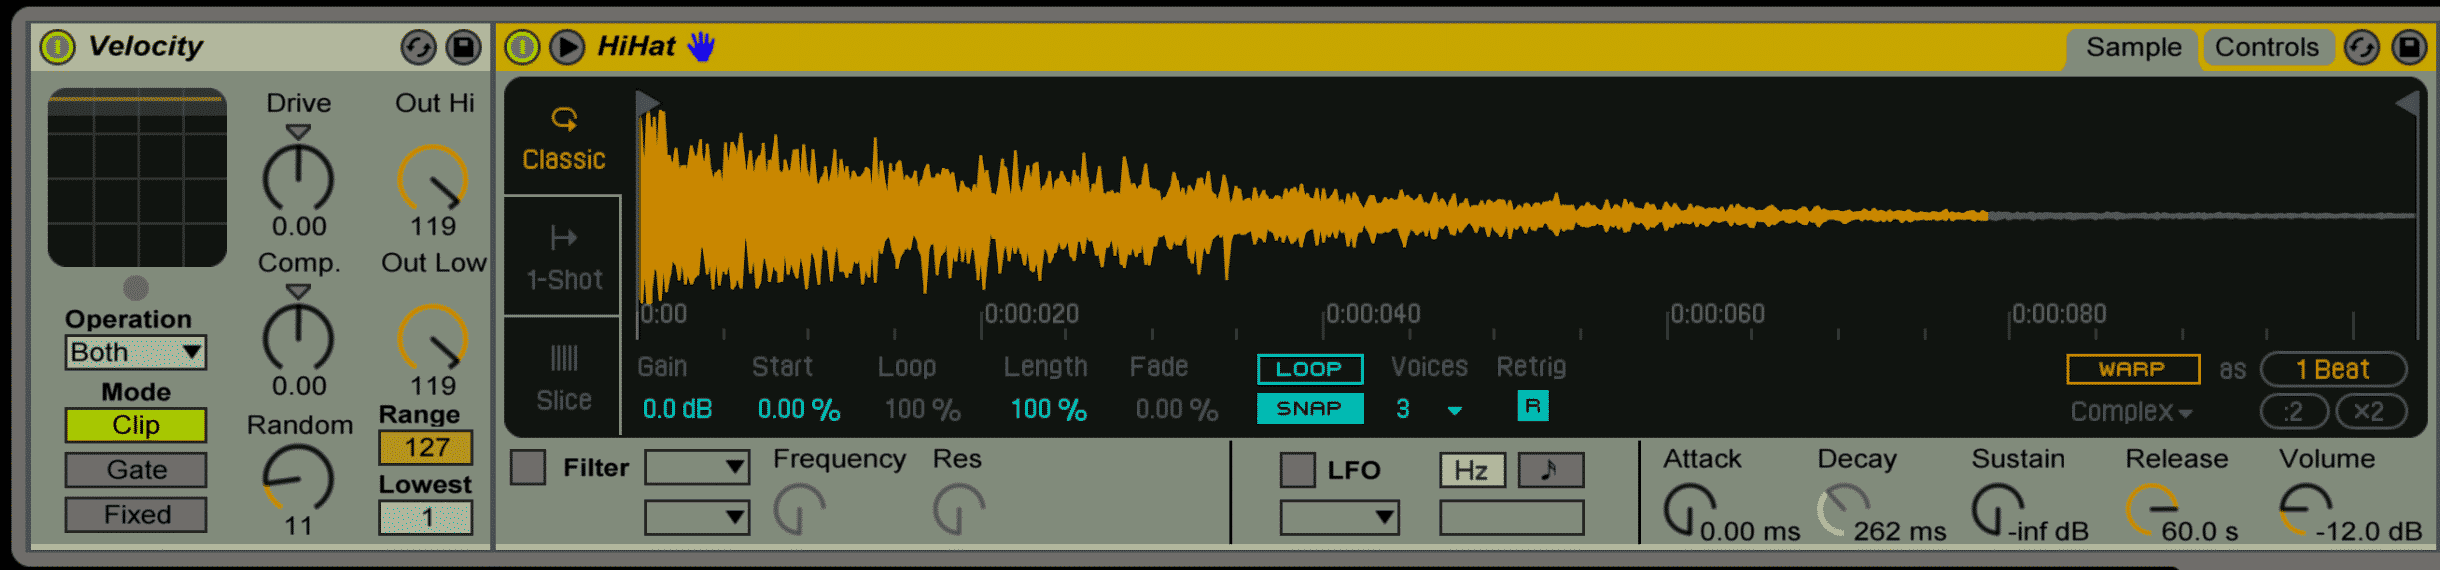
The first trick will take care of your volume but now you need something to emulate the way instruments react to whoever is playing them. Hitting a hi-hat harder will make it louder as well as quickening the attack of the transient; hit a hi-hat softer and it will be quieter and have a slower attack. Using the Sampler instrument you can modulate the start of any sample to produce appropriate changes in timbre based on velocity.

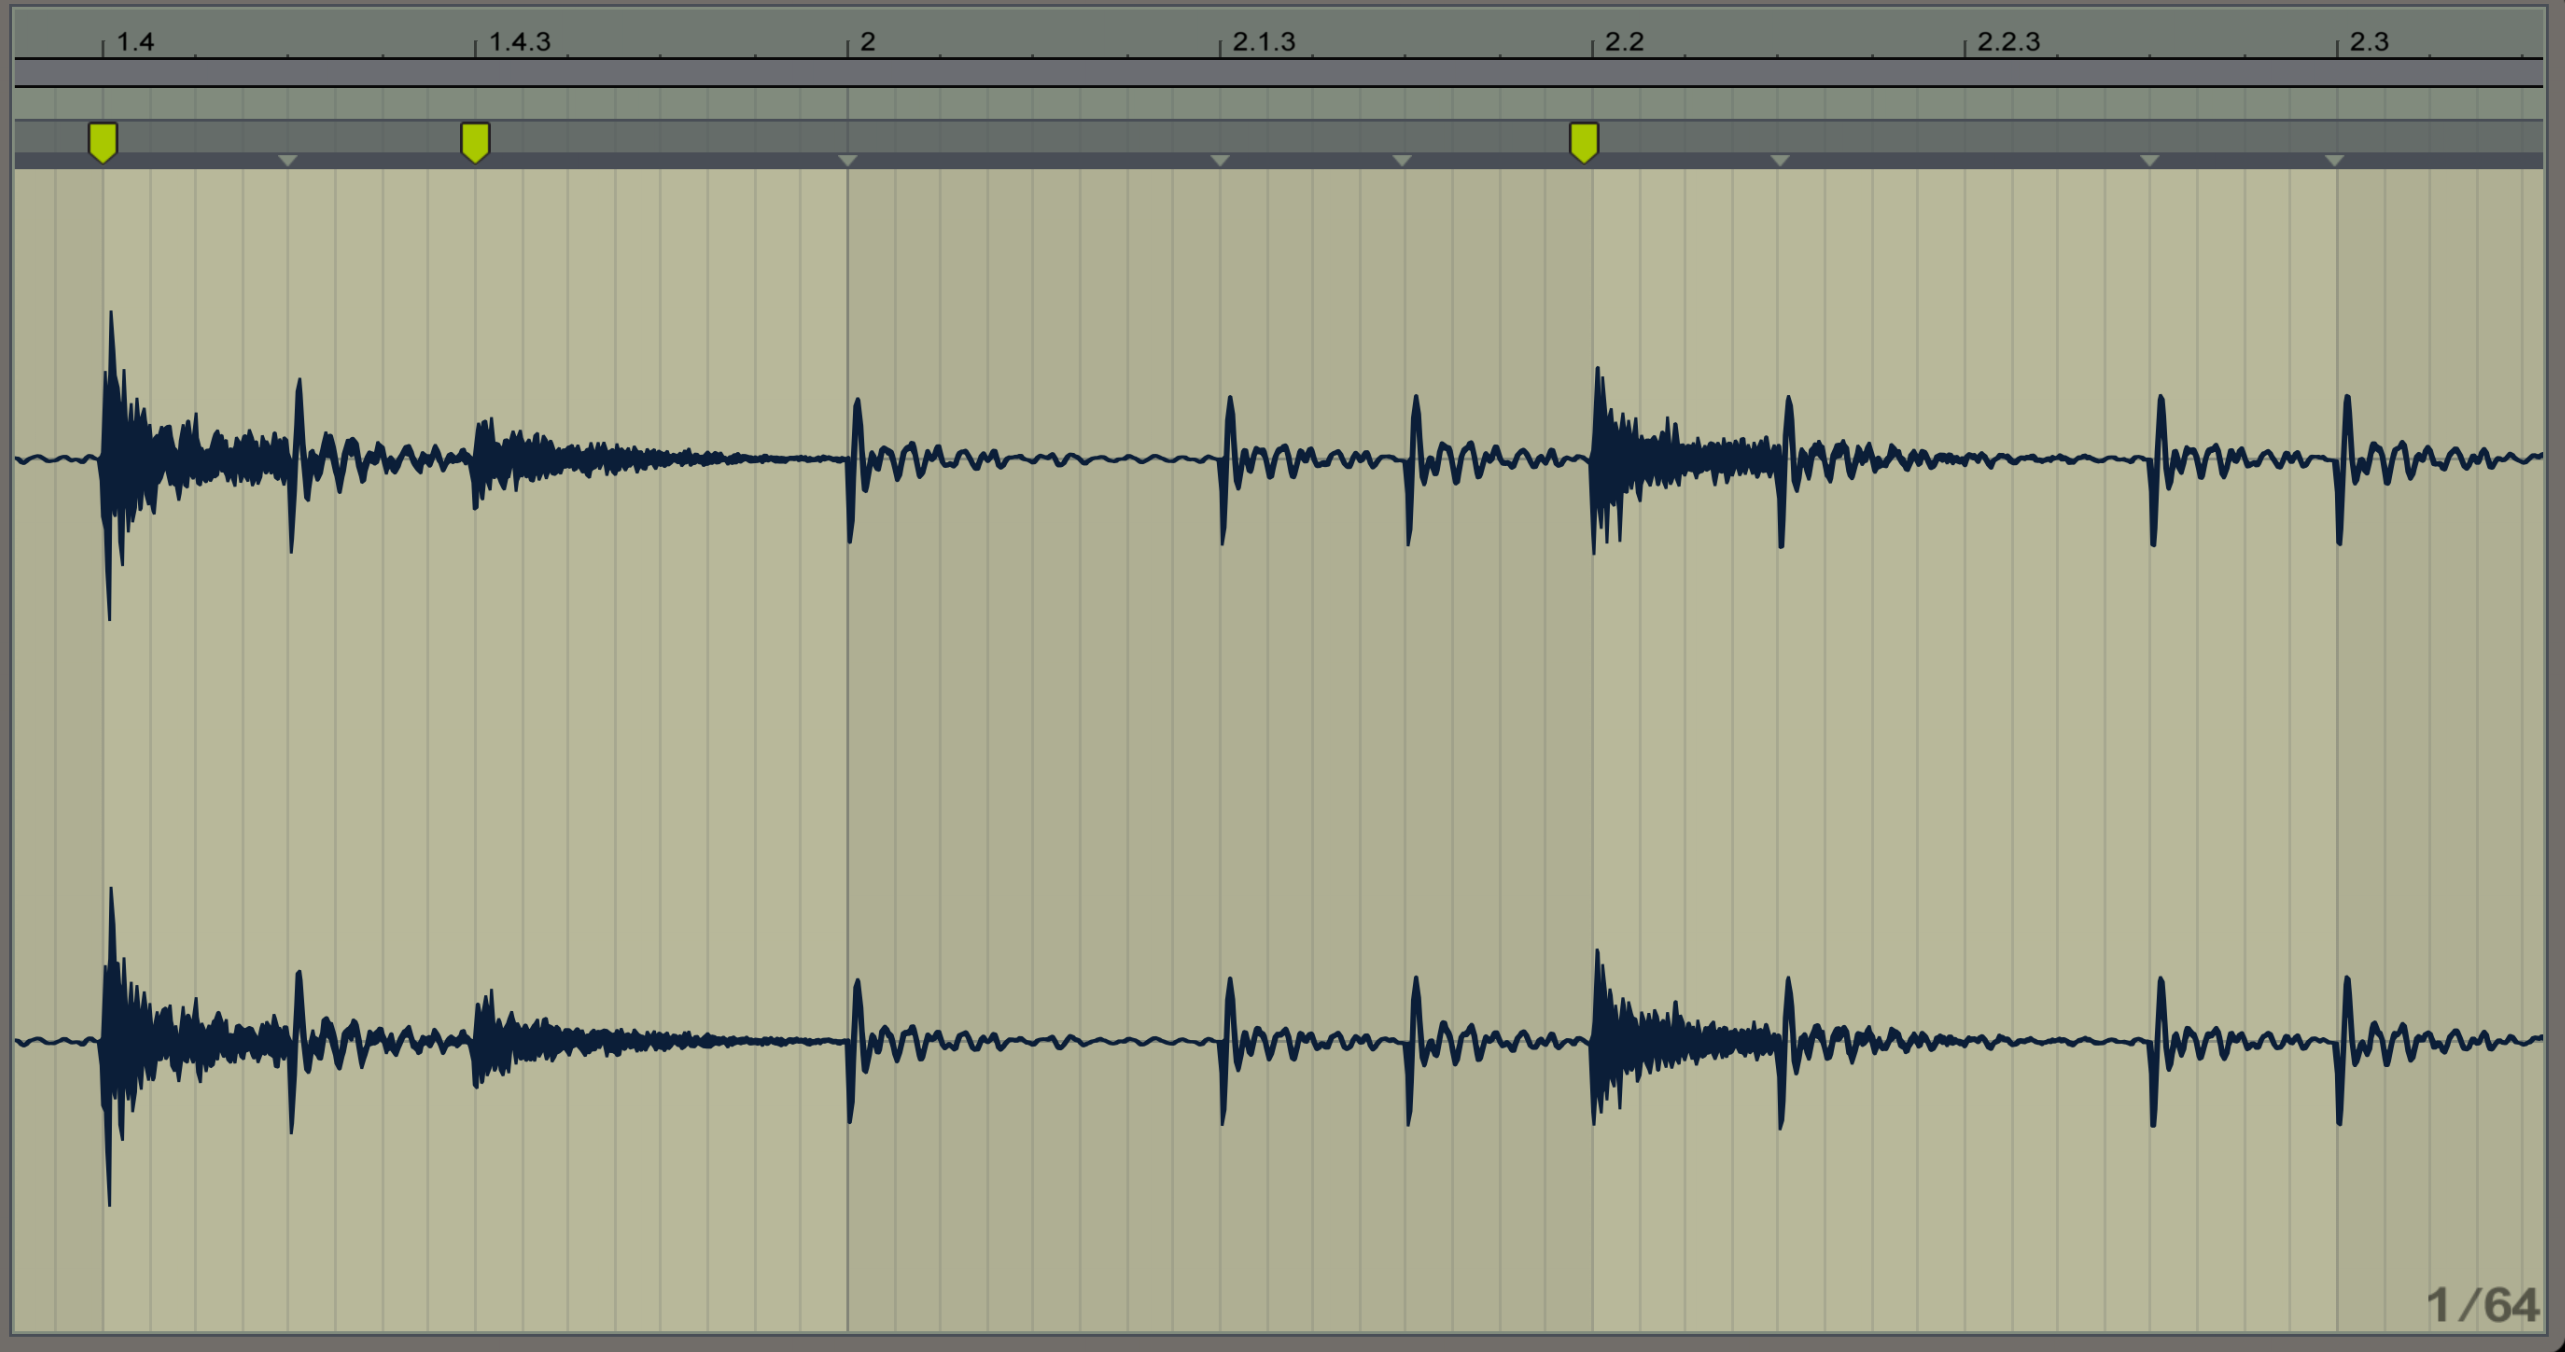
On the Sampler device click on the MIDI tab to reveal options for modulation, change Destination A to Sample Offset. Set the amount to a negative value, this will result in higher Velocities triggering earlier parts of the sample. Lower velocities will start the sample later resulting in less of a transient and a quicker decay; to increase the effect of this modulation make sure to add the Velocity tool and use the trick we explained in #1. Notice below how the snare (at the yellow warp markers) are all different velocities and transients.
Using the combination on chord progression will add some more variation into your sound, giving your melodies/harmonies some life. Whatever sample you use has to be put into Sampler for the tricks we mentioned to work, but they work well. Add the Velocity effect before your instrument and set the parameters accordingly, this time pay attention to the Velocity Range so that way you can make sure the instrument won’t be too quiet.

It’s especially clear in this looped 4-bar piano progression that on the 5th bar when the progression begins again the transient is much stronger, the 4-bar loop has now been transformed into a dynamic 8-bar progression.
If you are using the Simpler or any other Device and want the same way to assign modulation then you can utilize a Max4Live Device called Expression Control. If you have Live Suite then you can download the device here, but if you do not then you can download the same device for free here on the Max4Live website.
[su_divider top=”no” divider_color=”#d2d2d2″ size=”1″]
#3 Timing
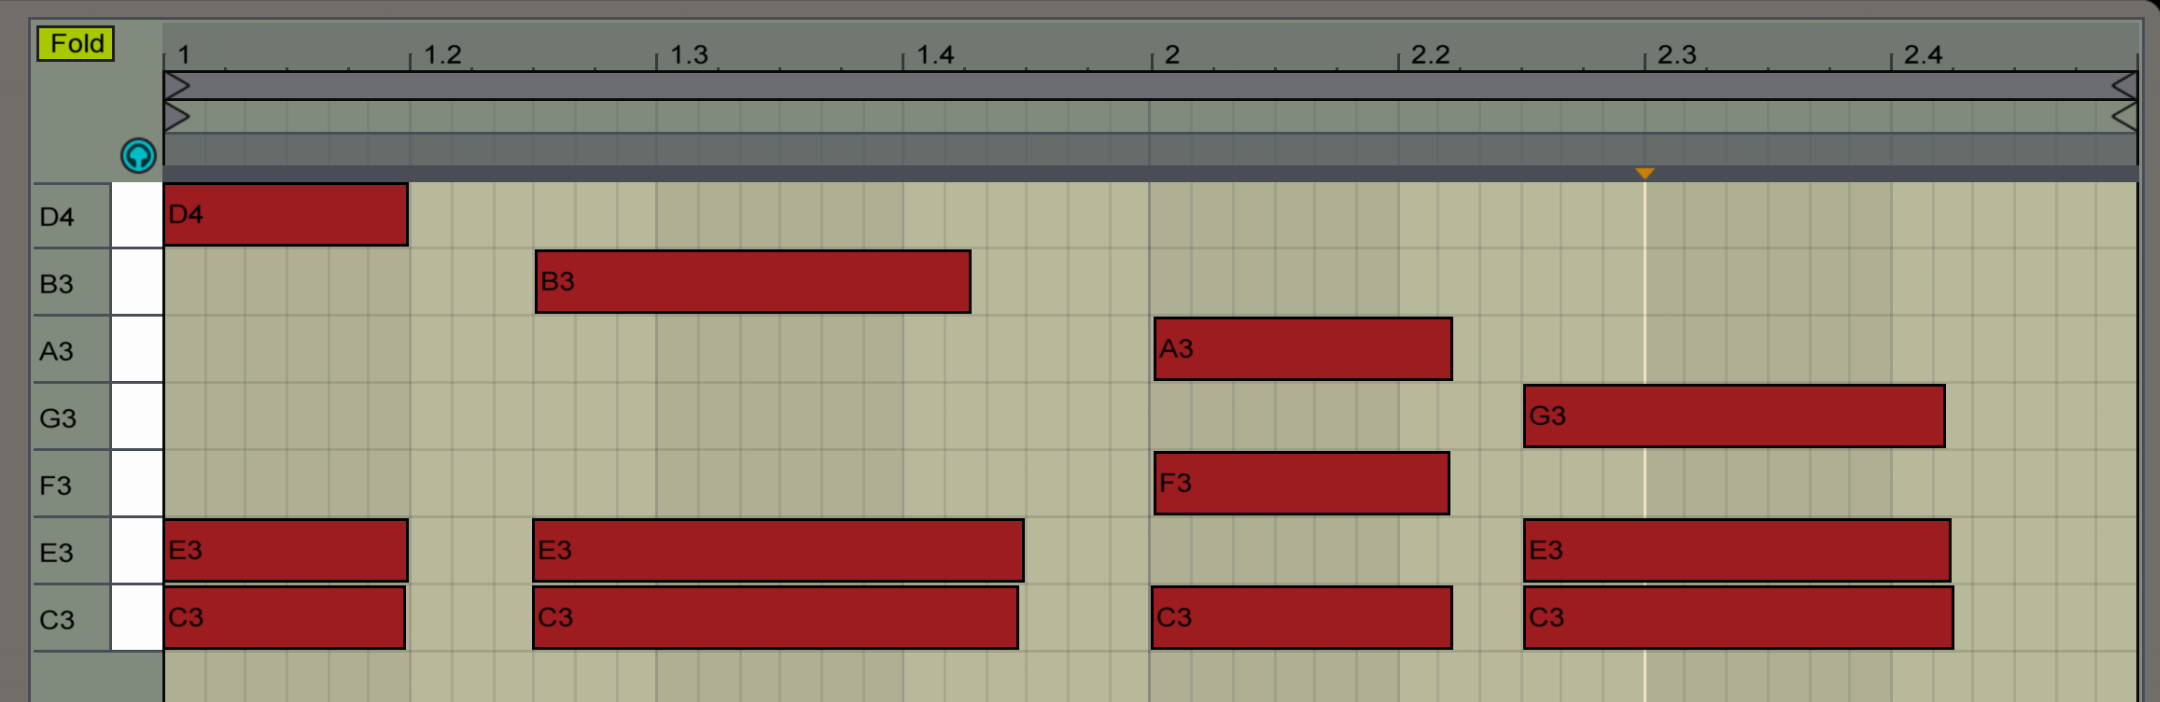
Now that we’ve shown you some ways to manipulate the volume and timbre, let’s take a look at how to automate the timing of your chord progressions. Below we have a 2-bar piano progression with each of the chords quantized to the grid. For those of you who type things in or use record quantization then you’ll know that being locked into the grid can produce an emotionless sound.
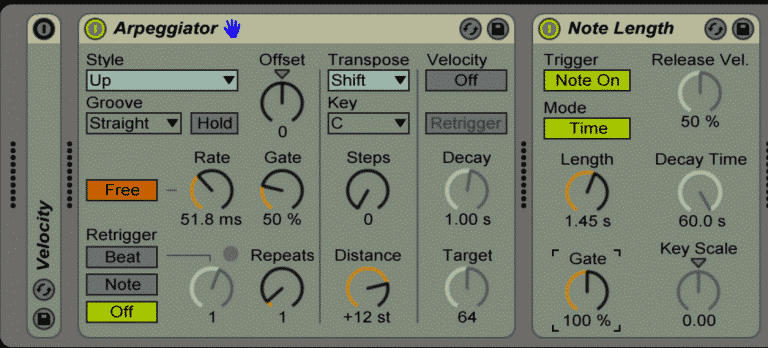
This problem can be alleviated by using the Arpeggiator and Note Length MIDI Effects on your instrument. Change the Sync button to Free and adjust the rate to an amount that you like, and turn the Repeats knob to 1. With the Style option on Up, this will create an effect similar to playing the piano live from the root note up through the rest of the chord. On the Note Length effect change the Mode to Time, then adjust the time to an amount you feel comfortable with; we chose 1.45 seconds because it plays the length of our notes without cutting them too short.
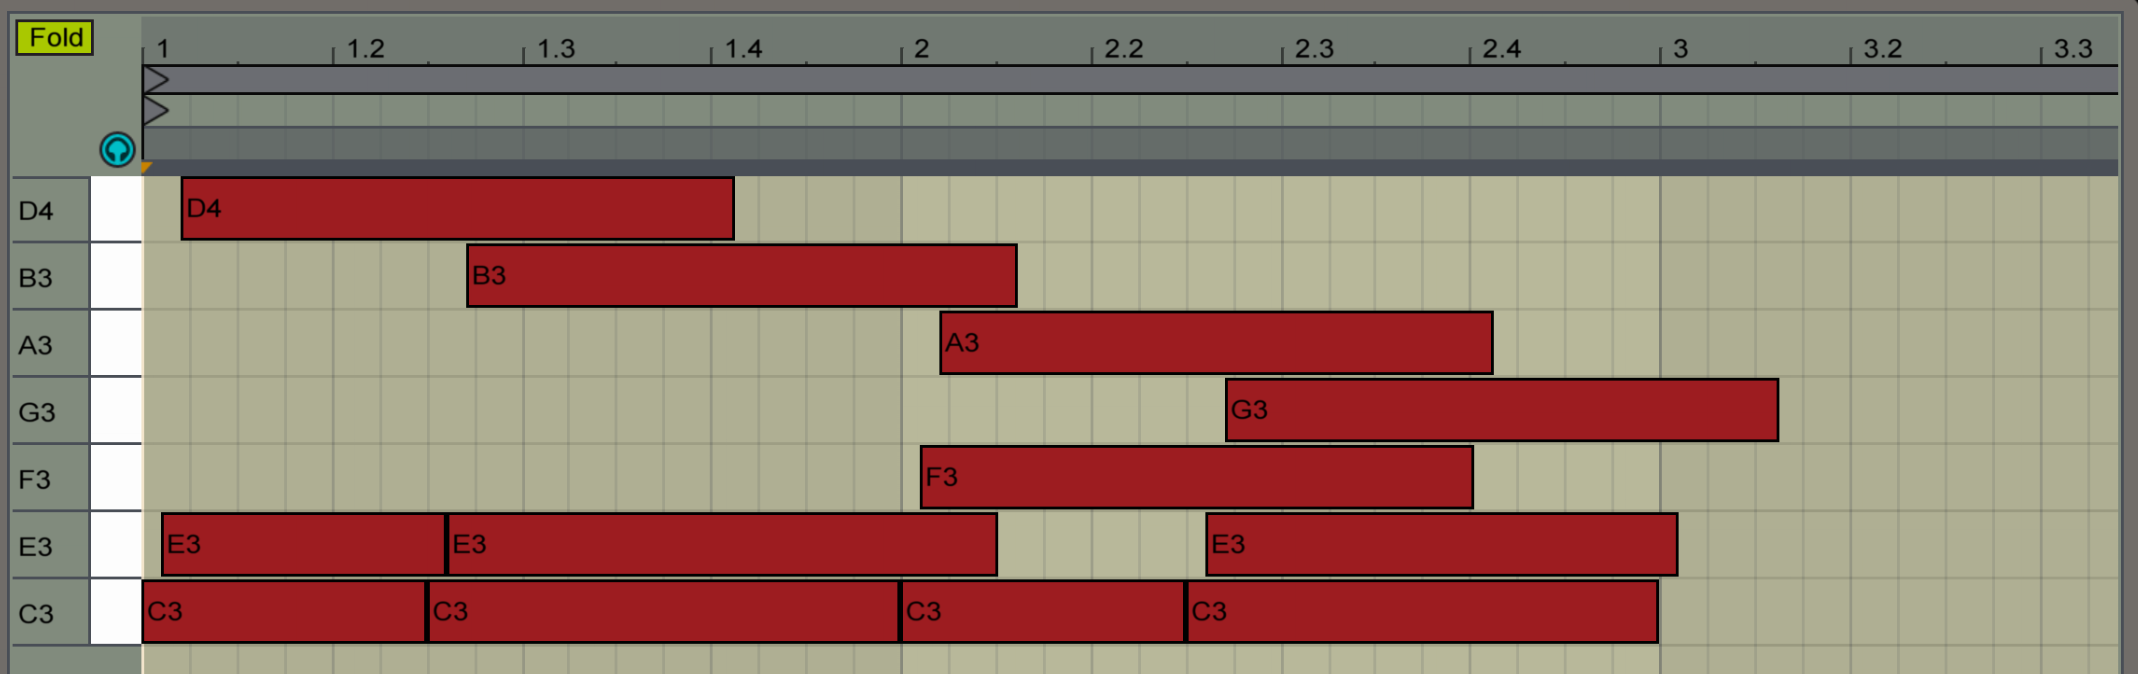
Below is what the progression look like after resampling with the Arp and Note Length effects on, we get a much fuller sounding progression this way. We must note that this trick only seems to work if you have a progression without any leading notes, i.e. the clip below will not play like it is supposed to anymore. Another drawback is that using this technique with the Arpeggiator means you can only push your notes after the beat.
If you need a workaround then look no further than the Groove Pool; find a groove you like, turn the Timing percentage to 0, and up the Randomize percentage to at least 35. If you like how it sounds then commit the groove to make sure it’s actually doing something, you can always Undo if you need to. The advantage to using a Groove is that you can get notes moved ahead of the beat as well as after, this can add a nice Swing to your music (pun intended).
[su_divider top=”no” divider_color=”#d2d2d2″ size=”1″]
Have you ever wondered what robots want to hear in music? If you’re done with trying to humanize your own tunes and want to lean into the robot takeover, read this article from our friends over at Joey Sturgis Tones – What Kind of Music Do Robots Like?
Featured Masterclass


0 responses on "Human After All? - 3 Ways to Humanize Your Music"