


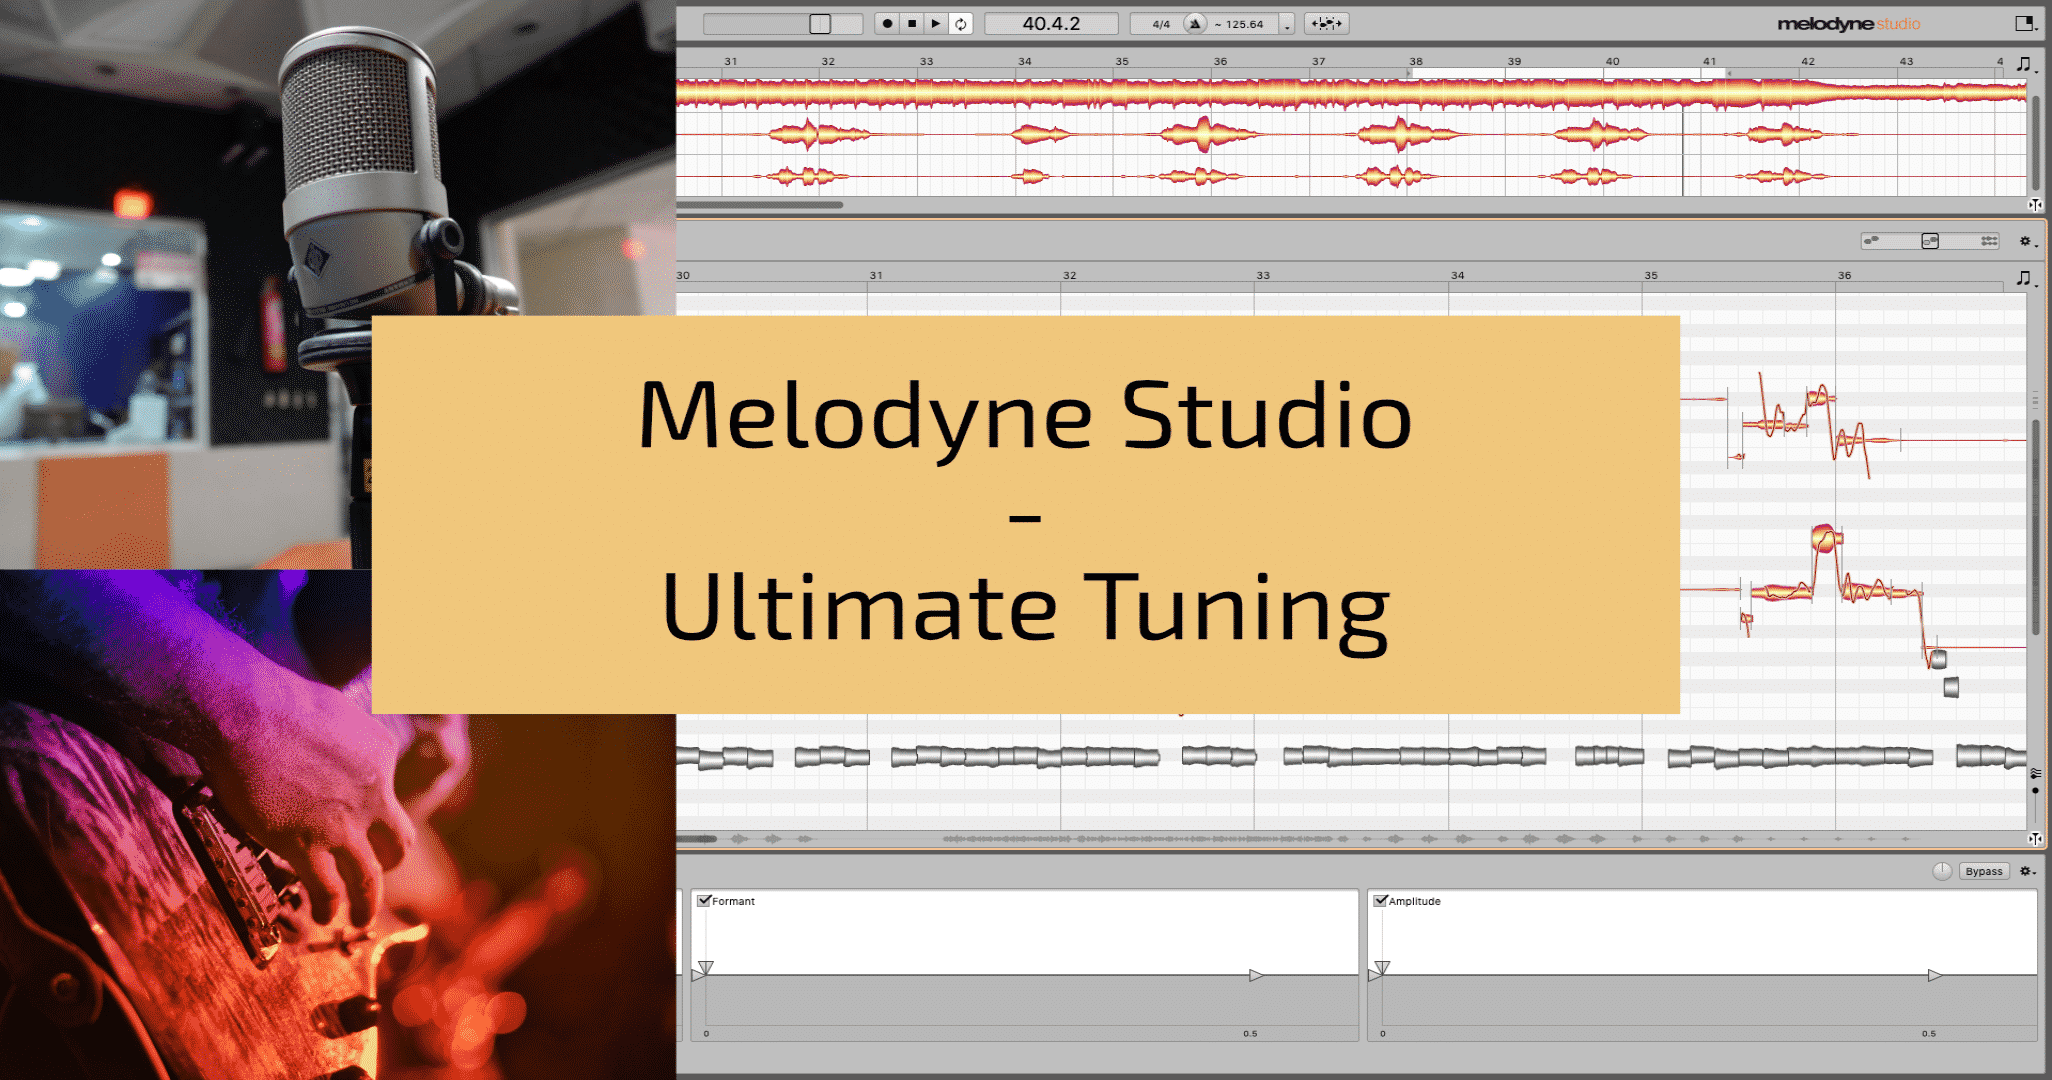
This week we have the pleasure of reviewing Melodyne Studio 4 for you. Melodyne Studio is the top-tier model of the software from Celemony. With it you unlock the full potential of their algorithms for multitrack and polyphonic tuning.
We reviewed the stand-alone version of the software, there being only minor differences in the DAW plugin version.
In the plugin version you have to record audio into it to make edits, and there is a different pane on the lft. Otherwise everything remains the same.
Introduction
Melodyne Studio 4 will come with all the bells and whistles. You get precision tuning (mono and polyphonic), time stretching (relocation and warping) and a crazy sound editor (formants, harmonics, synthesis).
In this article we’ll run through the interface, the basic tools you’ll use to get started and round it out by diving deeper into the advanced features. Along the way we’ll let you know what we think and sum it all up at the end. Let’s start with the layout.
Layout

Melodyne has an intuitive user interface with many aspects that are able to collapse and be tucked out of sight. There are four sections you’ll see – Info Panes, Note Editor, Sound Editor, and the timeline overview.
Info Panes
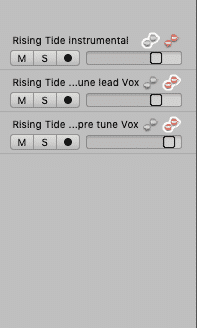
The Info Panes contain the project browser, and the track mixer.
Mixer 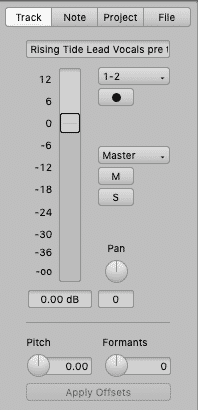
Track 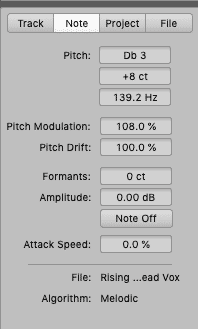
Note
The track mixer is where you can cue in the audio from each track. Clicking on the Orange or Gray blobs will activate and deactivate a channel and its audio.
Is It Nice to Look At?
Short answer – Yes. Longer answer below –
Melodyne Studio is in our opinion the best-looking one we’ve had the pleasure of reviewing. The
Time and Pitch Grids
The time and pitch grids in Melodyne are by far the most in-depth we’ve seen in any tuning software.
You have control over your entire scale, and individual notes plus their modes.
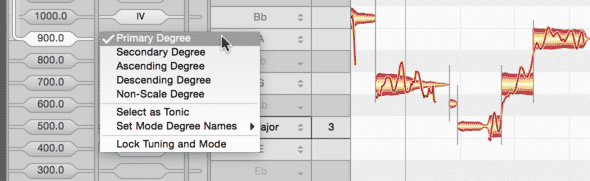
In Melodyne, you can specify your intervals, edits their ratios, make your own scales. The detection algorithm allows for the highest level of detail and control there is among tuning software.
You can also edit polyphonic audio. So guitars, vocal harmonies, etc. Watch the video below to learn some awesome tips to use with harmonies.
Click here to watch the video (WordPress video embed is currently broken)
Note Editing
In Melodyne, editing the notes is simple. If you want to access your tools you simply right-click and you can hover to select. It’s extremely quick.
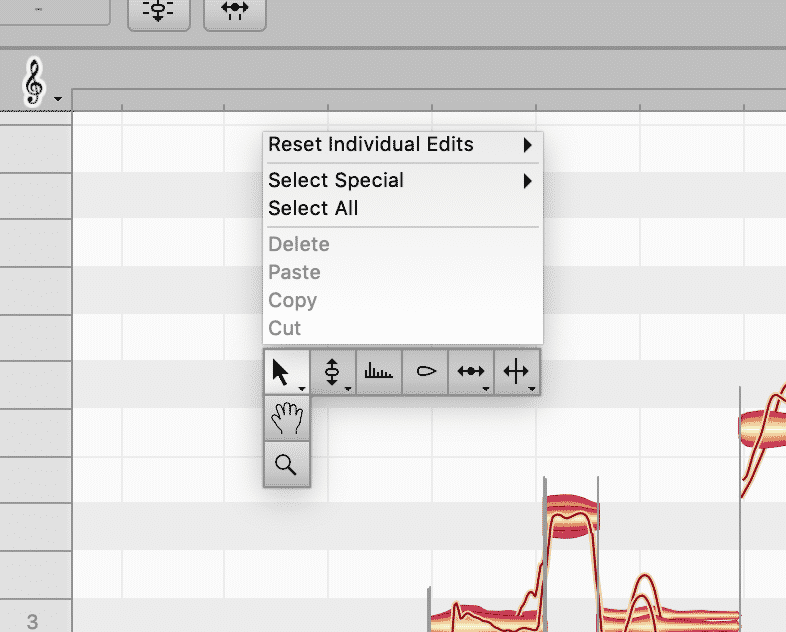
Alternatively, you can access your tools in the toolbar menu above the editing window. The same tools are found in both menus.

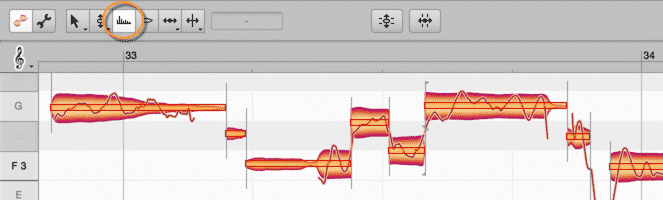
You have five tools – Pitch, Formant, Amplitude, Time, and Separation. Each can be used to alter the tone of your audio. Read below as we run through each tool.
Pitch Tools
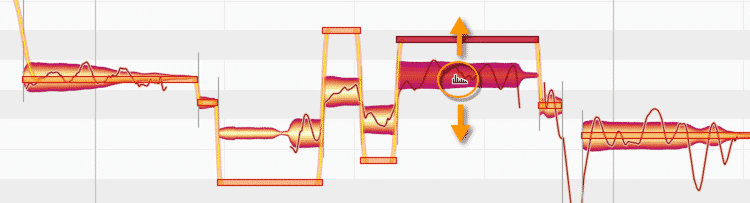
The Pitch Tool is used to alter the pitch of your audio. You can use it to raise or lower the pitch, smooth out transitions to consecutive notes, and adjust pitch modulation/vibrato.
Pitch editing is as simple as clicking and dragging blobs to the desired note. You can also double click to force a blob to the closest note in the scale. Click and hold
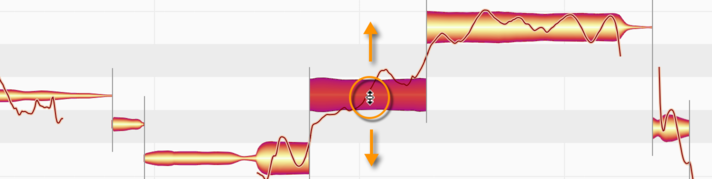
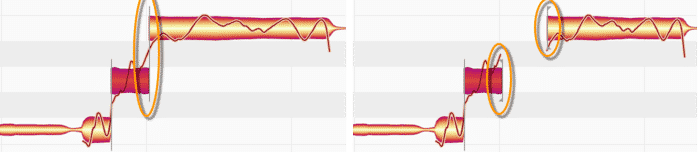
With the Pitch tool you can also adjust the transitions between each note. Move your cursor closer to the edge of the note and you’ll see it change into a slope, this indicates the ability to adjust transitions.
Finally, you can use the Pitch Modulation tool to adjust how much pitch modulation a note maintains. Melodyne champions its algorithm in part to how natural sounding it leaves vibrato, and this tool really tests those claims.

This tool also demonstrated the validity behind those claims. A strong vibrato will still carry emotion when narrowed and vice versa.
Like with all things effects oriented, it’s best to use the tool with intention in mind. If you are going for an extremely tuned sound you can achieve that. However, if you are aiming to leave your audio as natural sounding as possible, you can accomplish that with a combination of all the tools in Melodyne.
Watch the video below to see the pitch tool in action, and keep reading to learn about the Formant tool.
Click here to watch the video.
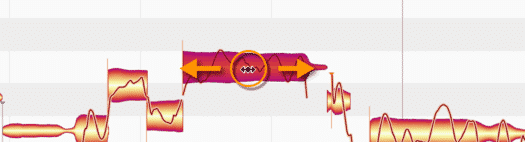
Formant Tool
The Formant Tool is one of the many things that puts Melodyne in a league of its own when it comes to
Formants are behind the flavor of a sound, what affects its timbre.
They are characteristic of the tone
The tools in Melodyne make it very simple to alter the formants. Switch to the formant tool and move the hick bar up or down.
You can adjust the formant transitions between notes the same as for pitch. Read below about the Amplitude Tool and changing volume in notes.
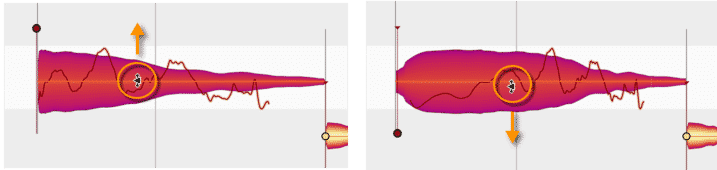
Amplitude Tool
The Amplitude is as straightforward as they come – the size of the blob represents the volume, decrease the size to decrease the volume. Increase the size to make it louder.
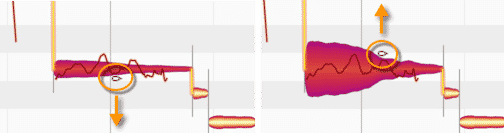
Adjusting a transition works the same here as with the other tools. Move your cursor to the edge of the blob to adjust.
Read below about the incredible Time Tool.
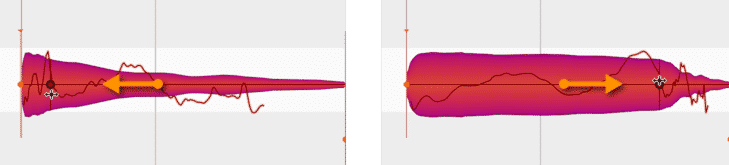
Timing + Separation Tool
The timing tool is another one of Melodyne’s strengths that sets it apart from the competition. It can stretch and compress audio brilliantly.
We’d say it sounds a bit better than Ableton Live’s warping, but not much. It’s on the
Time separation is possible in Melodyne through their Separation tool, a subset of the timing tool. It’s a bit finicky at first, but but you’ll quickly get the hang of it.
Making timing corrections with Melodyne is highly effective. We found you could make the timing extremely tight. Compared to Ableton Live there wasn’t a huge difference, but with the ability to adjust attack speed of each note Melodyne becomes the preferred tool
Attack Speed
Using the time handle tool you can adjust the attack speed of each note. This way you can smooth out or sharpen the attack of each note.
Time Handles
With this tool you can fine tune the evolution of each note. This control over detail is another one of the knockout features that Melodyne gives its users.
More incredibly, there is no limit on the number of handles you can add to a note. You’re only limited in how close you can move each handle.
Separation Tool
Finally, the separation tool is what you can use to split notes into multiple pieces for fine-tuning. Open up the separation tool and click away. This is quite useful when you have many words spread between a single note and you want to separate them.
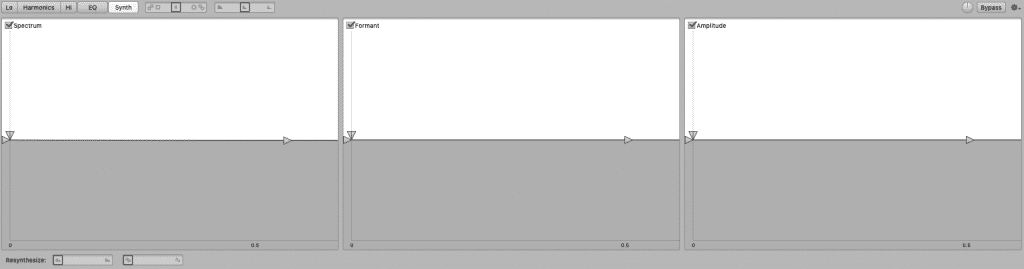
The Sound Editor
If there is truly one thing that makes Melodyne the king of tuning software, it would be the Sound Editor. This tool is impressive, it is so impressive we can only dedicate a portion of the review to its basics. For more details visit the user manual.
Macros

The Macro controls in the Sound Editor allow you to shape the EQ, Harmonics, and Synthesizer parameters.
Adjust the brilliance to increase or decrease the brightness of your audio. Adjust the contour to increase or decrease the height difference between frequency bars. The sharper the contrast the larger the tonal difference. Move between odd/even harmonics to alter the timbre of your audio. Finally, adjust the comb filter to add weird effects to your audio.
Harmonics

The Harmonics section of the Sound Editor gives you the ability to shape the overtones of the notes. here you can adjust the harmonics of each and every individual note.
Making adjustments is quite easy, you can click and drag to highlight multiple bars or affect single bars. We recommend reading the user manual or watching the video below to learn more details about the process.
EQ

Melodyne provides you with your very own EQ to shape the frequency spectrum of your audio. You have a large graphic EQ where you can highlight specific frequencies.
The EQ is an awesome addition and you’ll have some fun tweaking parameters in it.
Synthesizer
Finally, the synthesizer unit. This is where it gets wild. You may have thought, “wow, this seems like a neat plugin,” and you would be right. But now you’re about to go, “WOAH.”
Woah is right. The synthesizer inside of Melodyne allows for the coolest of vocal tuning effects. Here you have three ADSR units to effect your audio.
The Sound Editor is an extremely powerful tool for sound design. We recommend watching the tutorial video below to gain a more in-depth understanding of its functions.
Click here to watch the video.
Conclusion
Melodyne Studio in our experience the finest example of tuning technology available. Its abilities go far beyond pitch correction and timing adjustment – you can sound design, equalize frequencies, create harmonies, resynthesize audio, and much more. You can do all of this in a handy plugin or stand-alone form factor. All-in-all, it is the top of the line.
Now for the question – is it for you? That answer varies based on the user. Melodyne Studio may surpass the average users’ needs, but if you are a power user, tune vocals professionally, or simply love to get super creative then shell out for Studio.
There are three other tiers available with varying degrees of capability, so check out the Celemony webshop here to see which one is a right fit for you.
Featured Masterclass


0 responses on "Melodyne Studio - Ultimate Tuning"