


Should I Buy It? – Arturia Pigments 2
Yeuda takes a look at the second version of Arturia’s original softsynth – Pigments. Arturia has always been known for its killer hardware and incredible synth emulations, so it makes sense that Pigments holds up the reputation. It’s a truly unique plugin that we were stoked to review. Watch the review video below, and read our rating breakdown below that!
[su_youtube_advanced url=”https://youtu.be/komyMLkVReM” width=”400″ height=”200″ rel=”no” modestbranding=”yes”]
[su_box title=”Pigments 2 Rating: 9/10″ style=”glass” box_color=”#333333″]
[su_row] [su_column size=”1/2″]
Pros:
– Intuitive interface
– Deep modulation system
– Combine modulation sources for endless shape variation
– Micro Tuning with the option to load .scl files
– MPE support
– Granular sampler engine if fun to use and sounds great
[/su_column] [su_column size=”1/2″]
Cons:
– Built-In Effects can benefit from a Guitar Amp Simulator and more extended distortion algorithms
– Wave shaping oscillator effects can sound similar and redundant in some cases
– Granular FX should be added to the Wavetable and Analog engines
[/su_column]
[su_divider top=”no” divider_color=”#d2d2d2″ size=”1″] Get your copy of Pigments from the Arturia webstore for $199. [/su_row]
[/su_box]
[su_divider top=”no” divider_color=”#d2d2d2″ size=”1″]
Breakdown
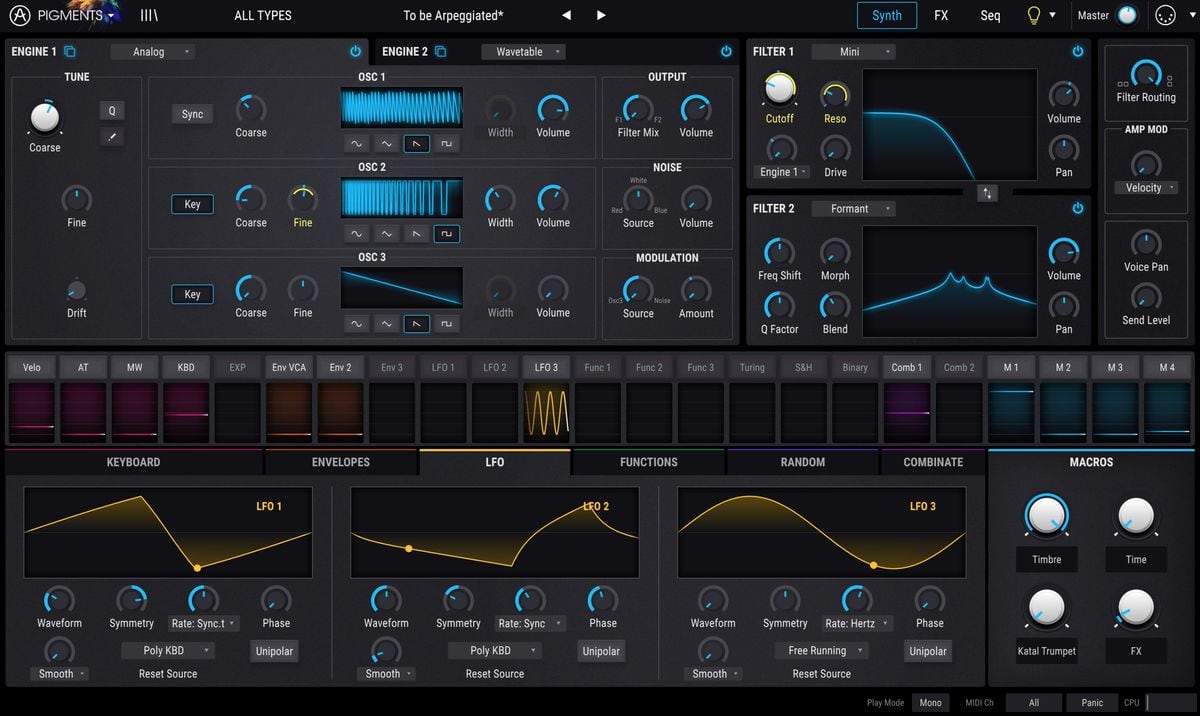
Pigments is Arturia’s original software synthesizer plugin. It has a notably colorful design that lends to its highly visual GUI, hence the name “Pigments”. The interface layout differs from the last few next-generation softsynths we have covered while still maintaining a modular style.
Next-generation software synthesizers all utilize enhanced oscillator voicing, complex modulation routing, and flexible mapping capabilities. Pigments stands in line proudly and takes a step forward with its own unique approach to synthesis.

The synthesizer has two oscillator engines, with three synthesis styles available. You can choose between Analog Synthesis, Wavetable Synthesis, and Sampling. We’ll dive into the details of each of these very briefly below.
[su_divider top=”no” divider_color=”#d2d2d2″ size=”1″]
Analog Synthesis Engine

The Analog Synthesis engine mode opens three oscillators for adjustment. You can activate key tracking, FM synthesis, and adjust the waveform of each. You’ll quickly notice the oscillators display the waveforms and even display their movement. That’s a great feature, we’ve docked other synths for lacking visuals like that.
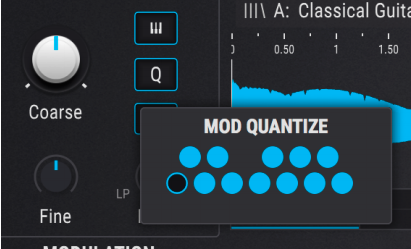
The Analog Synthesizer has some global parameters that apply to each oscillator. The first worth mentioning is the Mod Quantize. You can select which notes you want to omit from the coarse tuning knob. This allows you to tune the synth in an explicitly musical manner.
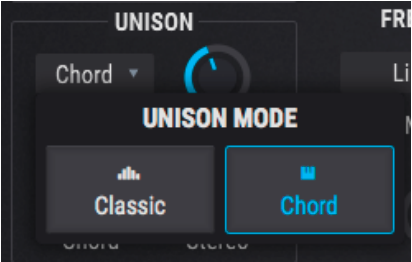
The second global parameter we love is the Unison mode. We get a Classic mode which allows you to increase the number of voices. Then there is a Chords mode which allows you to choose a chord preset. Finally, there is the Super mode which increases the number of voices in the style of the Roland Jupiter SUPERSAW.
You can send the whole synth mix to one of two filters, adjust the global modulation, and there’s even a noise generator. Let’s move on to the Wavetable Synthesis Engine below.
[su_divider top=”no” divider_color=”#d2d2d2″ size=”1″]
Wavetable Synthesis Engine

The Wavetable Synthesizer Engine comes with a lot of the typical features you will see on other wavetable synthesizers. You can choose from many presets, and even import your own wavetables. You have the option view it as a 2D (pictured above) or 3D waveform.
The waveshaping controls are limited to the four parameters pictured above – Frequency Modulation, Phase Modulation, Phase Distortion, and Wavefolding. Each of those four parameters has a dropdown menu to choose respective mode types. The same global parameters can be adjusted here as with the Analog Synthesizer Engine.
The Wavetable Engine sounds pretty darn good on its own so just wait until you start diving into the Modulation Matrix! Until then, let’s move onto the Sampler Engine.
[su_divider top=”no” divider_color=”#d2d2d2″ size=”1″]
Sampler Engine
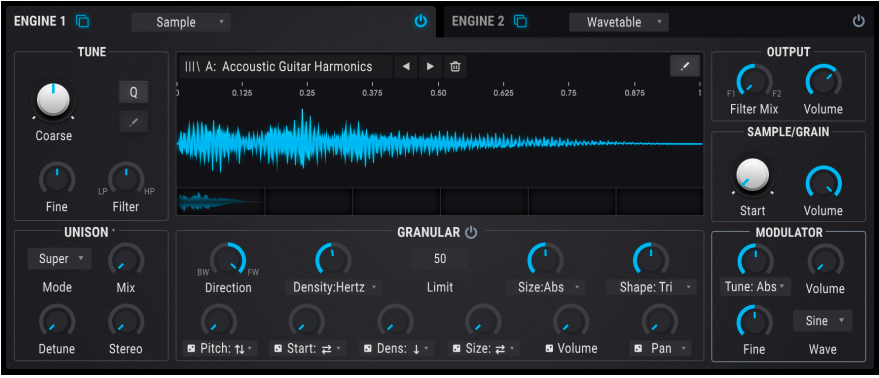
The Sampler Engine is a new addition to Pigments as part of the most recent update. This addition increases the complexity possible with Pigments’ prior features. You can load up to six samples in the Sampler Engine.
Each sample can be shaped using the Granular parameters pictured above. These are very cool. Change the direction of the grains, the pitch, and even how the grains are shaped.
The Sampler Engine comes with an expanded FX slot where the Unison was on the other two Engines. It’s called Shaper Mode. You can choose between four different modes, including Unison, to apply to the entire Samper Engine.

The other modes are Resonator, BitCrush, and extra Modulation knob. We love the flexibility here, we do wish these were available on the other two synthesis engines though.
One of our favorite features of the Sampler Engine is the Playback Mapping. You can choose between six different playback modes that will determine how the samples are played when you press the keyboard.
- Single – will play the currently selected sample
- Key Map – will map all six samples across the keyboard evenly unless specified using the range selector
- Key/Velocity Map – maps the six samples across 3 octaves and 2 layers of velocity
- Sample Pick – use a knob to select which sample is triggered
- Round Robin – jump to the next sample with each key pressed
- Random – randomly jumps between samples with each key pressed
Those modes make for a really spicy Sampler and a whole lot of fun.
[su_divider top=”no” divider_color=”#d2d2d2″ size=”1″]
Filters
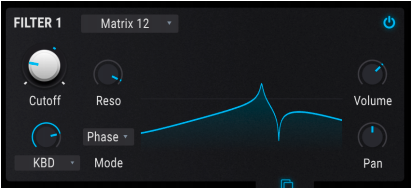
Pigments has two global filter modules that you can route both of your sound sources into. The filters are relatively simple in that they don’t have too many direct shaping controls. More complex modulation is passed on to the modulators we’ll cover later. That being said, there are options.
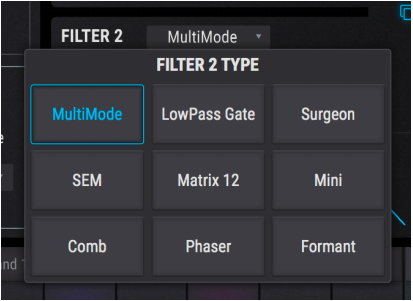
Both filters can be set to nine different filter modes, pictured above. Some of those modes are taken from their other products like the SEM, Matrix 12 and Mini filters. They are great modes to choose from and will impress with their tonal qualities.
Furthermore, Arturia included the option to blend between serial and parallel processing the two filters. The mixing option is such a lovely touch. It makes it far more interesting than having to choose between the two processing types.
We’ll cover the Modulator Section next.
[su_divider top=”no” divider_color=”#d2d2d2″ size=”1″]
Modulator Section

The Modulator Section is the beautiful, rainbow-colored heart of Pigments. It provides displays of your modulators and a central reference point for switching between them as well. Overall you have 24 modulators at your disposal. We’ll list them off below:
- Velocity, Aftertouch, Mod Wheel, Keyboard, and Expression Pedal
- 3 Envelopes
- 3 LFO’s
- 3 Function Envelopes
- 3 Randomization Engines (similar to LFO’s)
- 3 Combinators
- 4 Macros
That’s a whole lot of modulation ability right there. We won’t dive much into the details but each modulator has a lot of flexibility. The LFO’s have a big list of preset shapes to choose from, the Function envelopes allow for plenty of breakpoints, and the Randomizers are a total blast.

The funkiest modulators are the Combinators which allow you to blend together two modulators into a single output. It’s a really innovative way to visualize and execute a powerful feature.
We’ll move onto the keyboard next. It is housed in the Modulator Section but not functionally the same as the other modulators so we decided to separate it below.
[su_divider top=”no” divider_color=”#d2d2d2″ size=”1″]
Keyboard

The virtual keyboard in Pigments has typical parameters like Bend Range, Tuning and Play Settings. You can select different scale presets from here however and that’s pretty awesome. You can also adjust the portamento/glissando settings from here.
That would be the last of the features we’ve covered in the main tab of the plugin. Let’s move onto the other tabs next – FX and the Sequencer.
[su_divider top=”no” divider_color=”#d2d2d2″ size=”1″]
Sequencer Tab

The Sequencer in Pigments has a built-in Arpeggiator in addition to the actual sequencer portion. You’re given 16-steps in which you can adjust all sorts of different parameters.
On the left side are global sequencer settings. You can quantize the scale here so it only plays certain notes, randomize the steps, adjust the rate, and activate Polyrhythms. The Polyrhythms feature is super cool, activate and each sequencer track will run its unique own step-length loop in tempo with the other tracks.
[su_divider top=”no” divider_color=”#d2d2d2″ size=”1″]
FX Tab
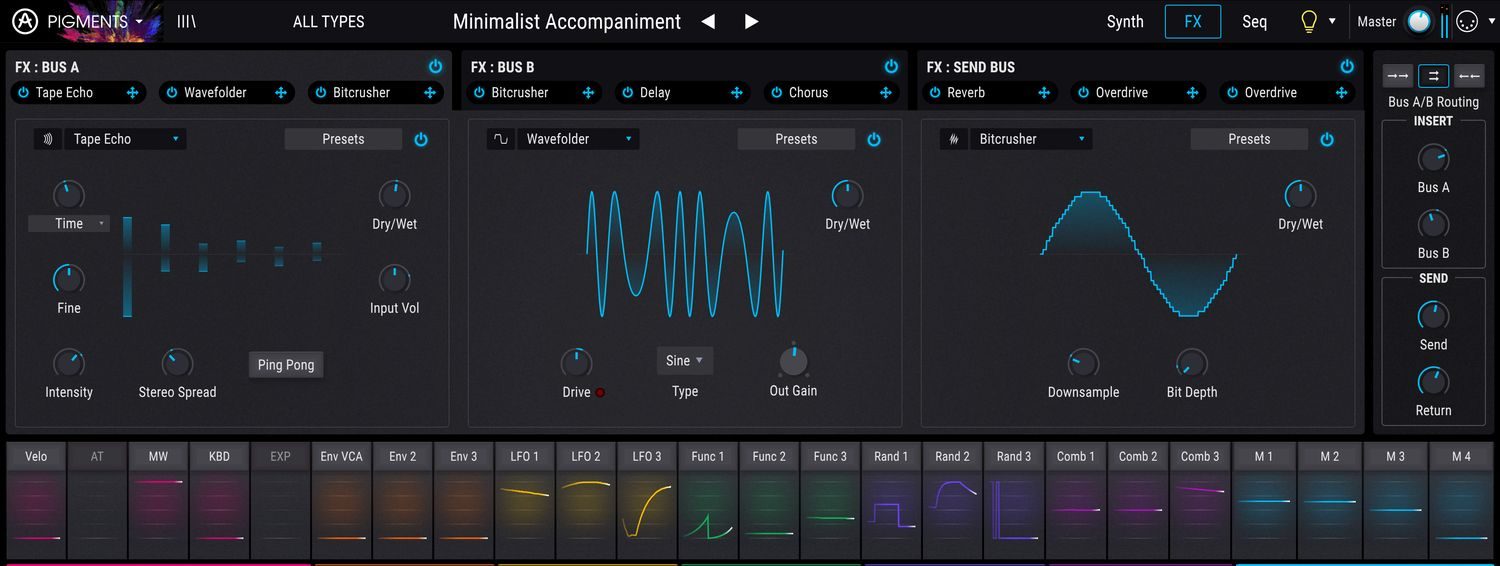
The last tab in Pigments is the FX Tab. Here is where you can manage your three FX busses. You have two insert effects busses, and the third is a send effect bus. On each bus, you can select up to three configurable effects slots.
There are fourteen effects, and they are all pretty plain. They certainly get the job done, but they won’t blow you away. We were more impressed with the Bus routing options on the right side (pictured above). You can change the routing order for the busses from serial, to parallel, and even reverse.
It’s good that there are effects that you can use in the plugin, but compared to other next-generation softsynths they are underwhelming.
All in all, it was a great synth to review, and if you don’t have anything already it is worth getting. For those who are already drowning in softsynths then you may just want to check out the demo first.
[su_divider top=”no” divider_color=”#d2d2d2″ size=”1″]
Where Can I Learn More?
Are you new to production, or want a crash-course in mastering? Beat Lab Academy’s online production and in-person Ableton courses will give you the skills you need to become tomorrow’s super producer.

Featured Masterclass


0 responses on "Should I Buy It? - Arturia Pigments 2"