


Sound Recipes #1: Layered Future Synths (Free Download)
Bright super saw synths can be heard in some variation in almost all styles of music that involve electronic sounds.
Many popular virtual synths are capable of making this type of sound, synths like Sylenth1, Massive, Spire, Serum, Dune etc.
If you don’t have any of these plugins, or simply want to explore the potential of Live’s built-in synths, we got a step-by-step guide to take you through building this very useful sound.
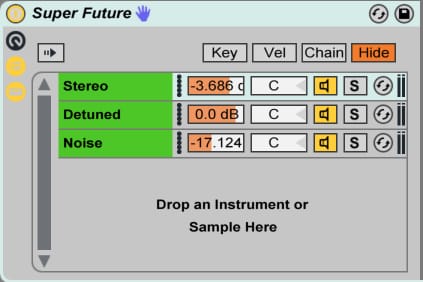
For this sound we will use 3 layers inside an Instrument Rack:
- Stereo Saws/Squares
- Heavy Detuned Super Saws
- Noise Layer
[divider style=”clear”]
Stereo Saw/Square with Analog
For the first sound we’ll use Analog.
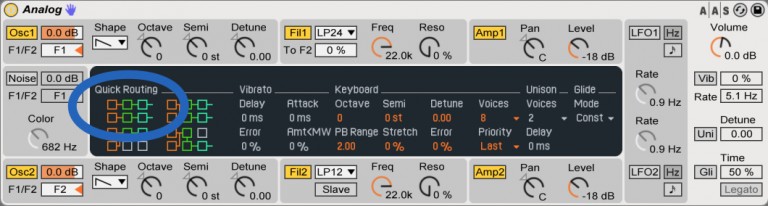
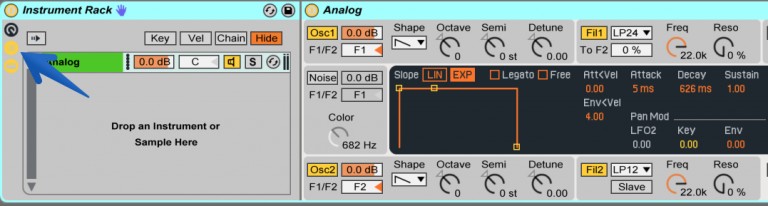
Go to Analog’s Global Section by clicking next to the master volume in the grey area.
Here we will change the Quick Routing to the first option. This will set up Analog to send each Oscillator to it’s own Filter -> Amp signal flow.
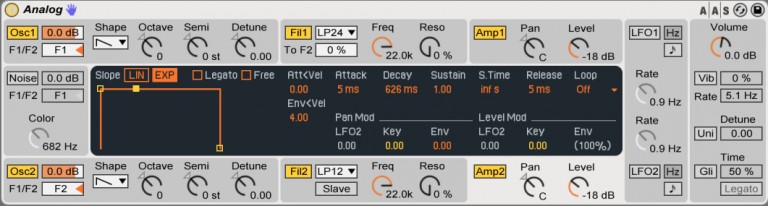
Next we’ll take the sustain of both Amp1 and Amp2 all the way up for a solid sound.
You can also turn the release all the way down (again on both amps) for a more controlled gated sound.
Both of your amp envelopes should look something like this:
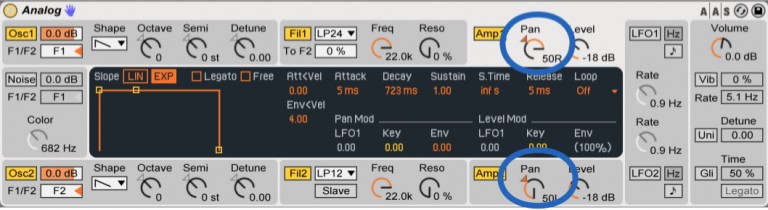
Next, Pan each Amp to an opposite side. This will give you a more wider sound, but still not detuned so you still keep everything in focus:
Finally we go back to the global section and maximize the amount of voices just in case we want to play chords with a lot of notes. And we can also add Error for a bit of analog fill (each note will be slightly detuned).

You might have noticed that by default Fil1 and Fil2 use different types. One is LP24 and one is LP12. Let’s leave it as is since there’s a slight difference between the left and right.
You can choose other waveforms for this synth. I sometimes go with square waves.
Nice. Now that we’re finished with the first layer we can start working on our second layer by using Operator.
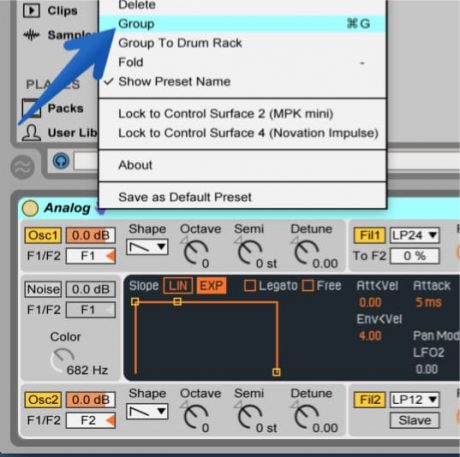
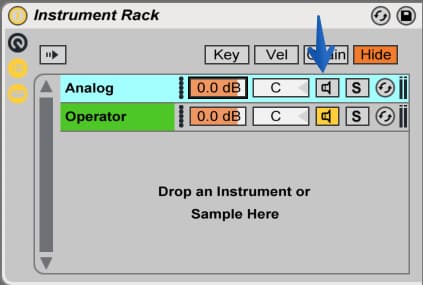
Before we start with Operator we need to group the Analog into an Instrument Rack, which will allow us to do sound layering using chains.
Right click on Analog’s Device Title and select Group.
Next, Click on the Chain List icon.
Then drop Operator in the Drop area to layer it with the Analog.
[divider style=”clear”]
Detuned Super Saws
You heard this sound many times before.
Super Saw is a type of sound that has been around since the very early stages of electronic dance music.
It is achieved by taking multiple saw waves and detuning them slightly off from each other. This gives a very thick and bright sound.
Lets make a Supersaw using Operator. Load the Operator into the Instrument Rack with the Analog.
We need to mute the Analog chain in order to work on the Operator sound individually.
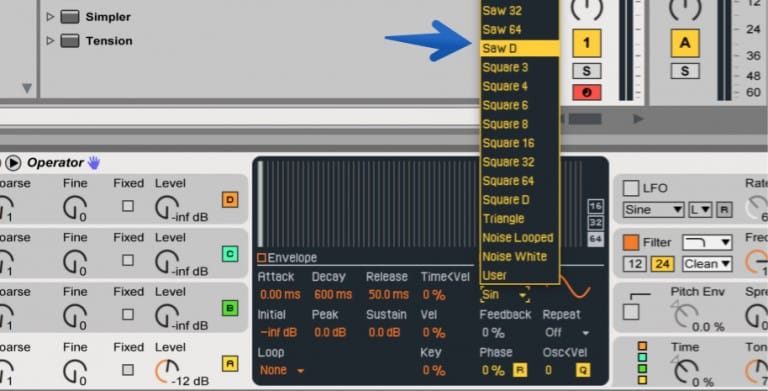
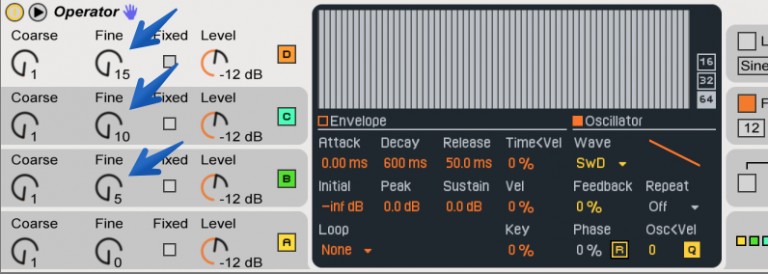
Next select the Saw D waveform for Oscillator A.
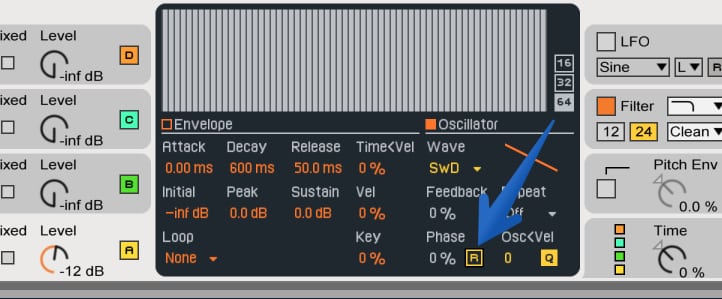
For the sound to work well we need to turn off the Phase Retrig of the waveform. This will make the waveform start from a different place every time a note is struck. Together with the other detuned Oscillators, we are about to add, we will get a big bright sound. If we don’t turn off Retrig we might end up with a very punchy sound but not very phat.
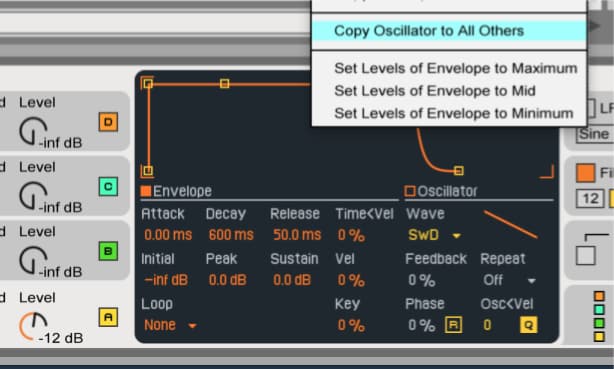
Next show the Envelope, Right click, and choose Copy Oscillators to all others. This will copy the waveform and volume envelope settings for B C D.
If we play it now we’ll get a very bright sound. You can play with the Tone knob (in the global section to the bottom right next to the Master output volume) to get more or less harmonics. Indeed cool, but not what we are going for.
This extremely bright sound is a result of FM synthesis. Super saws traditionally use subtractive synthesis to achieve that famous sound.
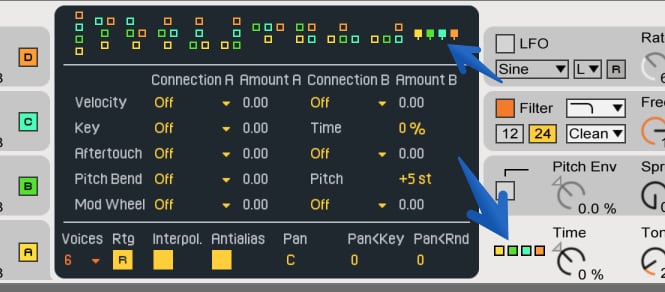
To change Operator to function as a subtractive synth click on the algorithm which is the 4 colored boxes next to the time knob.
Then, change the routing algorithm to the far right one. Operator is now no longer an FM synth but a subtractive one.
Next detune Oscillators B, C and D. I usually go with 5, 10 and 15, but please do experiment.
By now the sound is probably too loud and is clipping. Turn down the master volume in Operator.
To finalize the sound you can also turn up the spread knob for even bigger more stereo sound and change the Voices amount to 20 just in case you’ll play chords with a lot of notes.

[divider style=”clear”]
Noise Layer
For our final layer we’ll add a simple noise generator for more grit and character.
You can take either Analog or Operator and load it into the instrument rack as the 3rd layer.
Next, turn off all Oscillators except for one. Change the waveform of that Oscillator to Noise.
You can use a High-Pass filter to make the noise very bright and thin so it won’t grab too much space from the overall sound.
Now you can use the Chain Volume to adjust how much noise you want mixed in with the other two layers.
[divider style=”clear”]
Global Effects
You can throw anything you want after the rack to further process the sound. I would recommend at least adding an EQ Eight with a high pass filter (up to around 125Hz max) to cut the low frequencies since this sound will probably be layered with a bass sound.
The layering never ends!
Recommended Effects: Reverb, Multi-Band Dynamics, Saturator, Erosion, Phaser and Flanger.
[divider style=”clear”]
Make It a Rack
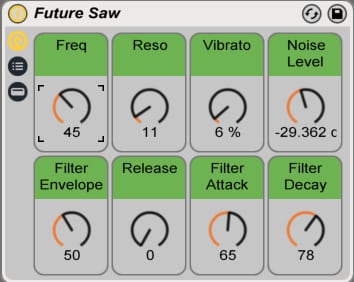
I’ve made a rack out of these sounds by mapping key parameters from all the layers to the Macros.
Super saws with filters and filter envelope can transform the sound into something completely different and modern.
The Macros:
Freq – Filter Frequency
Reso – Filter Resonance
Vibrato – Add Vibrato (LFO on Pitch) to only the Analog layer.
Noise Level – Noise Generator output layer
Filter Envelope – Filter Envelope Amount
Release – Length of Amp Release Time
Filter Attack – Filter Attack length
Filter Delay – Filter Decay length
Featured Masterclass


0 responses on "Sound Recipes #1: Layered Future Synths (Free Download)"