


Sugar – The Ultimate Audio Sweetener
This week we are covering an incredible multiband plugin called Sugar. Sugar is made by Process.Audio where they are all about the music. They are a collection of artists and music makers who got together to shift the focus of modern production back onto the music-making and less on the minutia of music editing. Sugar is the result of this mission, and is appropriately dubbed the ‘ultimate audio sweetener’.
Sugar is a one-stop-shop, a plugin that is meant to put mastering-level processing in an easy to use package. In this article, we will run through the plugin’s features and tell you what we love and think could improve (if anything). Continue below!
[su_divider top=”no” divider_color=”#d2d2d2″ size=”1″]
Workflow
The workflow with Sugar is simple, it is made to enhance audio. There are limited controls so you only need to face a limited amount of parameters to shape your sound. It makes sense to start at the top so that’s what we’ll do. There are 4 bands at the top of the plugin that you can adjust to increase each effect. These bands are based on the most common areas that need attention in popular mixes. Each has two switches to add a specific flavor to the mix when increased. Read below to learn more about the switches.
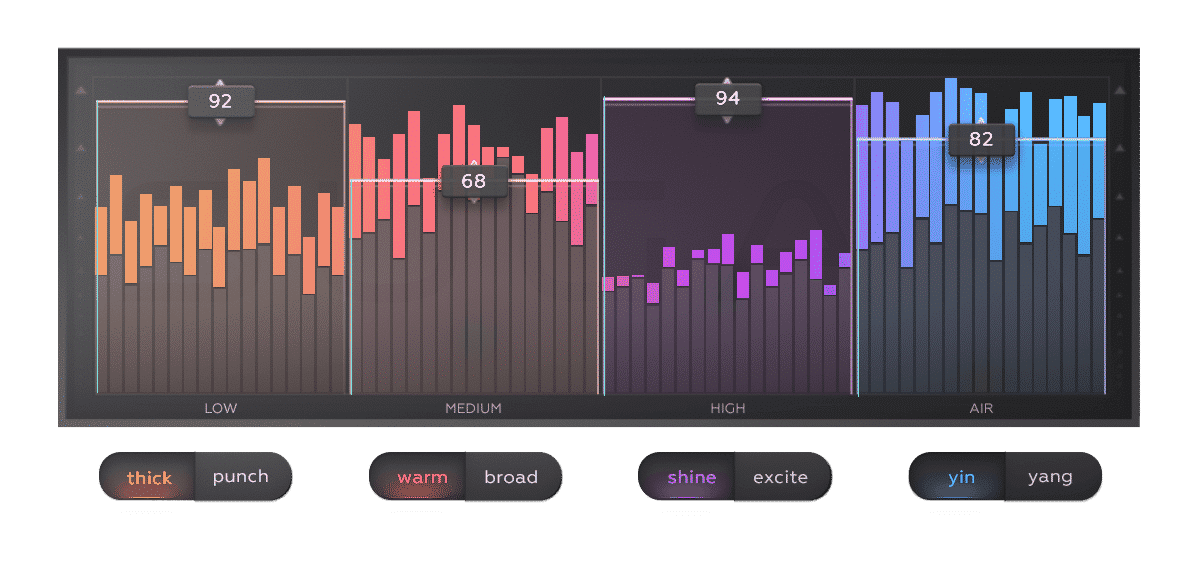
The Low band will add thickness or punch. Thickness is the default setting, it will add some girth and heft to your low end. Say you have a snappy kick but it lacks body, this band would be a good place to start. Punch will add transient energy if you want to maintain the snap of your kick while increasing the umph select this option.
Increase the Medium band to make your music warmer or broader. Adjust this band to thicken your mix up without it becoming too muddy. The options to switch between will change the focus from narrower to broader. If you find broad to add to much mud, switch over to the “warm” option.
Tweak the High band to add shine or to excite the audio signal. Shine will enhance frequencies already present in the audio while excite will add harmonics to the signal.
Finally, adjust the Air band to add Air; the Air band has two options to choose from for flavor – Yin and Yang which refer to the signal Phase. Choose between them to see which sounds better. As Process.Audio says, “The Air Band lets you bring out the sun in your music.”
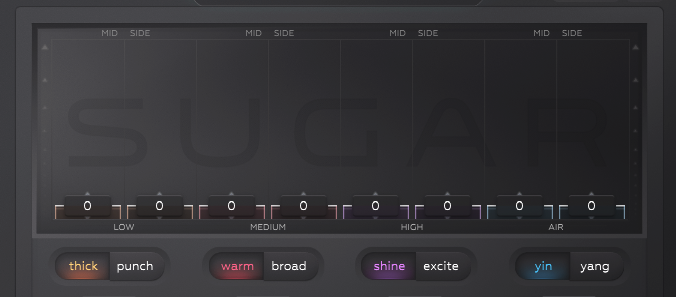
The top section is very useful and very easy to use. If you switch over into Mid/Side mode you can also edit the balances for each band in the graph. It’s fantastic that they thought of this feature and implemented it so well. It expands the functionality of the plugin beyond individual channels and opens it up to use on bus mixing and even mastering. See the image below to see what the multiband area will look like when switched over to Mid/Side mode.
Once you’ve dialed in your balance between each of the bands you can head below to the middle section of the plugin for some global control. Continue reading to learn about it.
Middle Section
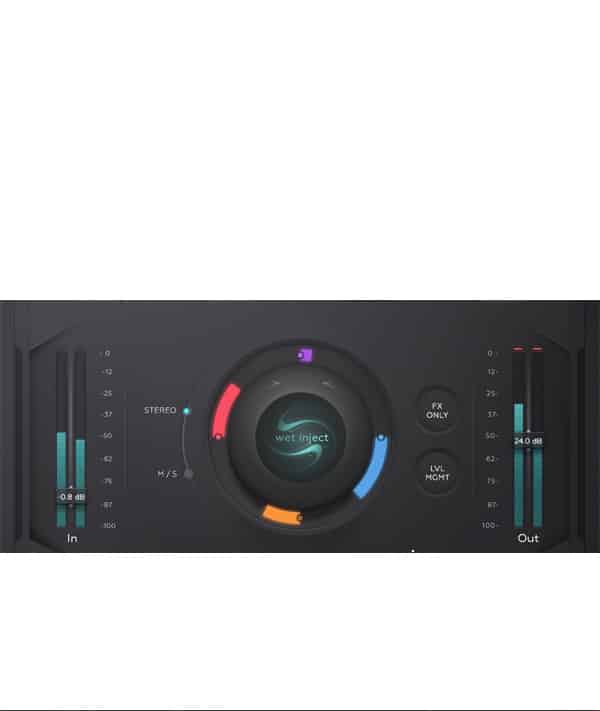
The middle section of Sugar is where you can control some global settings for the plugin. There you will find Input and Output level faders, the switch for Stereo or Mid/Side processing, the FX Only Button, the Level Management button, and the Wet Inject dial. The FX Only button is a solo button for hearing the isolated wet signal of Sugar. Click it to hear exactly what Sugar is adding to your music. This is a clever addition to the plugin and well thought of on the developer’s part.
The Level Management button is another win for us, it automatically adjusts loudness based on the incoming audio signal and Sugar processes. A lot of energy may be added when adjusting the multiband faders so LVL MGMT will account for that increase by turning down the volume. This is especially useful when trying to hear the actual effects at work. Bravo!
Finally, is the Wet Inject dial. This centerpiece of the plugin is majorly dope. It adds a level of sophistication to Sugar with the pure simplicity of its function. Essentially, this dial will turn up each of the faders in the multiband area by the same amount while maintaining their relative differences. So twist the knob and you’ll increase the effectiveness of every fader across the spectrum.
Bottom Section
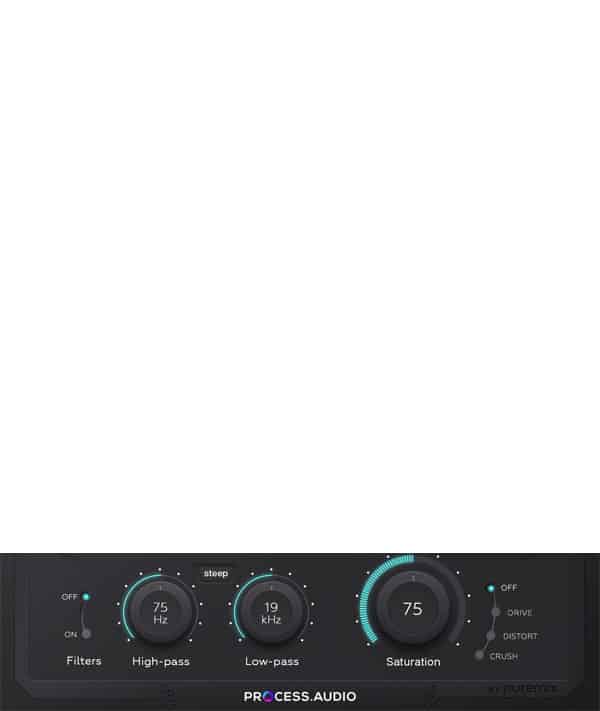
The last section of the plugin we’ll go over is the bottom section. There you will find the Filters and Saturation knob. You have a High-Pass filter, and a Low-pass filter, both of which have a range between 10Hz and 22kHz. In between is a button called Steep that switches the grade of the filter slope from -24dB/octave to -48dB/octave making a much sharper slope. This is especially useful for shaping low-end content.
The Saturation knob is a lovely thing to work with and Process.Audio has a humor about the options. They say the saturation options range from to mild to obnoxious, those are some options we can certainly get behind. Each will add a certain flavor to your signal and carries its own benefit. Experiment with individual, bus, or master processing.
Conclusion
Sugar is, in fact, a hell of a plugin, built to perform many tasks in one good-looking interface. The CPU usage can be dangerous at times but that’s hardly a deal-breaker for such a simple-to-use beast. Make sure to check out the learning center here that Process.Audio has put together to learn more about individual uses for the plugin. It dives much deeper into specific uses for Sugar and explains them quite well. Sugar is currently priced at $149; if you’re interested in getting yourself a copy then visit their web store here.
Featured Masterclass


0 responses on "Sugar - The Ultimate Audio Sweetener"