


EQ Eight Explained
What Is An Equalizer?
Have you ever noticed the “Bass” and “Treble” options on an amplifier? Or the “Low, Mid, High” filters on a DJ Mixer? Chances are you’ve used an equalizer (or EQ) in some way or another. An equalizer is a device that can increase or decrease a specific range of frequencies in a track. In music production, EQ’s help producers reduce problematic frequencies, enhance musical ones, and help shape the overall sound to achieve depth & clarity. In this article, you’ll get an overview of a popular, modern equalizer – and a breakdown of the types of filters found in it.
[su_divider top=”no” size=”1″]
All About EQ Eight
So what does a modern EQ look like? Watch the video below to see our head of education, Yeuda Ben-Atar, take you through the ins and outs of Ableton’s “EQ Eight” – the stock EQ that comes with Ableton Live.
[su_youtube_advanced url=”https://www.youtube.com/watch?v=qbcCS6UIqKY” width=”400″ height=”200″ autohide=”yes” rel=”no” fs=”no” modestbranding=”yes”]
[su_divider top=”no” size=”1″]
Did you know?: The human hearing range goes from 20hz to 20,000hz. However, we don’t perceive these frequencies at an equal volume. Our ears are most sensitive to the frequency range where the human voice lies, at around 2000-4000hz. Learn more about equal-loudness contours and how to use them in your mixing here.
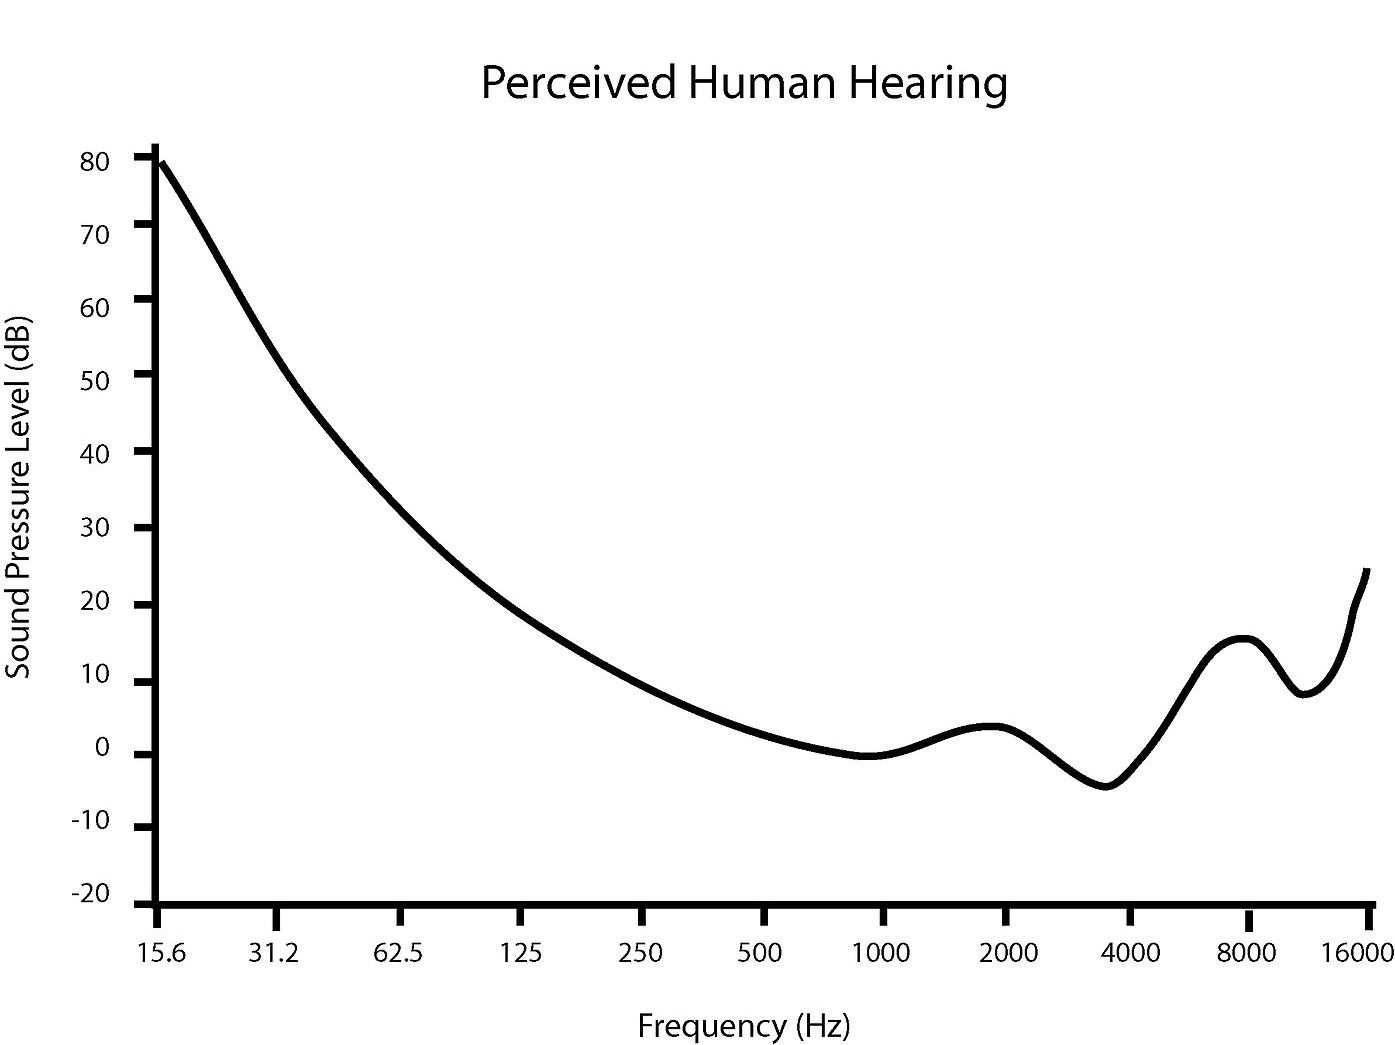
(Source: Daniel Callejas, 2012)
[su_divider top=”no” size=”1″]
5 Common Uses Of EQ’s
There are many reasons music producers use an equalizer, ranging from technical to creative. Here are a few common ones below.
1. Mixing
As equal loudness curves (see above) show us, we don’t perceive every frequency range equally. Therefore, music producers need a tool to boost desired musical ranges and reduce undesired ones. In most professional mixdowns, you will find an EQ on almost every track in the mix.
The most common application is a low cut filter that removes unwanted bass frequencies to make room for the kick drum & bassline. We’ll explain more about different kinds of filters below.
[divider style=”clear”]
2. Fixing Fighting Frequencies
A general rule of thumb in music production is to have an instrument that covers every octave in the range of human hearing, for the final mix to sound ‘full.’ But what happens when two instruments share a similar range of frequencies? Naturally, they will clash. Producers use EQ’s to identify and then notch out frequencies that are fighting from one of the instruments to solve the problem.
The most common instruments that have fighting frequencies are kick drums and basslines. Both these instruments tend to live in the bass & sub-bass part of the mix. So a producer typically finds the peak frequencies of the kick and notches them out from the bassline. This way, the kick has space to punch through the mix, but the bass continues to co-exist in the frequency ranges below and above it. This creates a psychoacoustic image of the bass layer sounding “complete.”
[divider style=”clear”]
3. Special Effects
EQ’s can also be used to recreate special effects.

For instance, automating a low pass filter to slowly open over time gives the effect of a nightclub door opening. You first only hear the throb of the kick and bassline, and then are slowly greeted by the mids and finally the hi’s.
[divider style=”clear”]
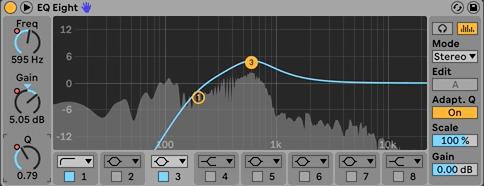
4. Adding Movement To A Track
EQ’s aren’t just static effects. They can also be used to add dynamic movement to a track.
A popular example of this is pairing an EQ with a compressor, such as using Multiband Dynamics.

But perhaps a more playful example is by boosting a certain frequency range using a bell filter and having it slowly move up & down in frequency either via automation or by using an LFO (pictured above).
It’s additions like this that help music sound less repetitive – and equalizers have a big role to play here.
[divider style=”clear”]
5. Synthesis & Sound Design
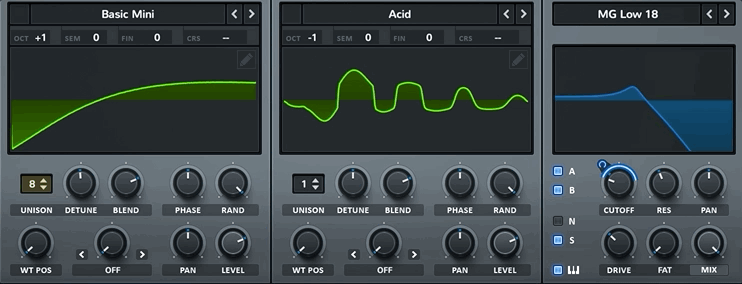
“Oscillator > Filter> Amp.” Those are some of the building blocks of any synthesizer. Filters (the core component of equalisers) are a crucial tool in synthesis & sound design – allowing producers to create the specific sound in their head. In the synth above (Serum), you can see a low pass filter mapped to an envelope, so that it responds to a note being pressed & released. Check out the video below to learn more about how filters can be used to add complexity to a sound (additive synthesis) or remove frequency ranges to make space for another layer (subtractive synthesis).
[su_divider top=”no” size=”1″]
EQ’s: Then & Now
Equalizers haven’t always had the compact, neat user interface found in modern EQs like Ableton’s EQ Eight. They were first used to improve the quality of sound reproduction in telephones and the first few motion pictures. Then, graphic & parametric equalizers became a mainstay in studios as well as consumer electronics to optimise the sound response in a listening environment.

(Source: Soundschematic.com, 2011)
Analog EQ’s are still used in studio racks around the world today. However, most modern electronic music producers use digital EQ’s such as EQ Eight, which comes free with Ableton Live, or Fabfilter Pro Q-3, a popular option that costs $180
[divider style=”clear”]
Reminder: If you’re a Beat Lab student, email [email protected] to unlock a 50% discount on all Fabfilter products!
[divider style=”clear”]
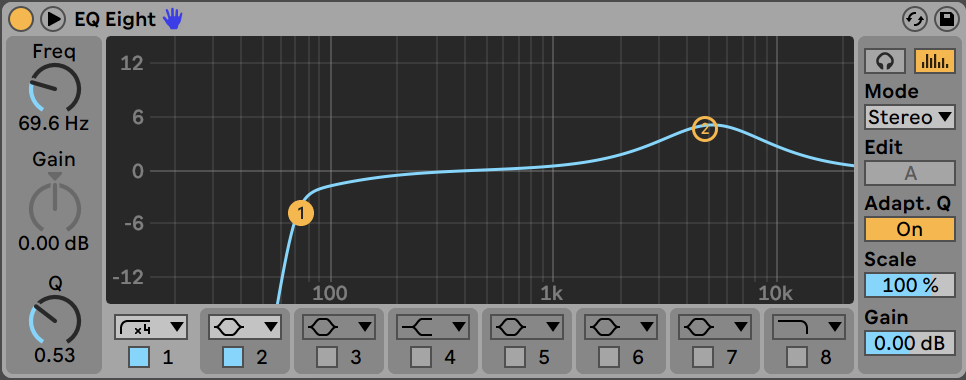
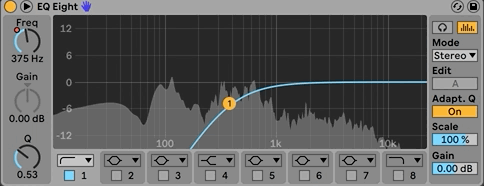
Parts Of An Equalizer

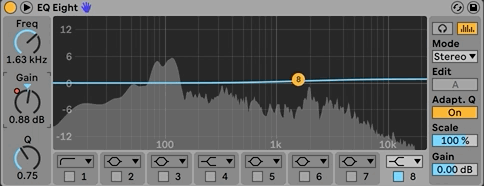
The fundamental concept to understand about a classic parametric equalizer such as Ableton’s “EQ Eight” above is that it’s a graph with two axes. Frequencies are mapped on the horizontal axis, with low frequencies (20 Hz) on the left and high frequencies (20,000 Hz) on the right. Volume is mapped on the vertical axis, with the middle line being 0 dB (no boosting or attenuation).
Now – let’s take a look at the parts that allow a producer to select a frequency range and shape the output as desired.
[divider style=”clear”]
Filter Mode
Chooses from different filters such as low cut, high cut, bell, notch (explained below).
Frequency
Adjusts the centre frequency for the selected band. If the selected filter is a low cut or high cut filter, this parameter sets the cutoff point.
Resonance or Q
Q stands for ‘Quality Factor.’ This control adjusts the bandwidth of the selected band. A higher Q value will result in a narrower range of frequencies being selected, and a lower Q value will affect a wider range of frequencies. Hot tip for Ableton Users – hold alt or option while adjusting a band to easily adjust the Q.
Gain
This control allows you to select by how many decibels you want to boost or attenuate the selected range of frequencies.
[su_divider top=”no” size=”1″]
Filters & Their Uses
Filters are the main building blocks of equalizers. Here are the main types of filters you’ll see on most equalizers.
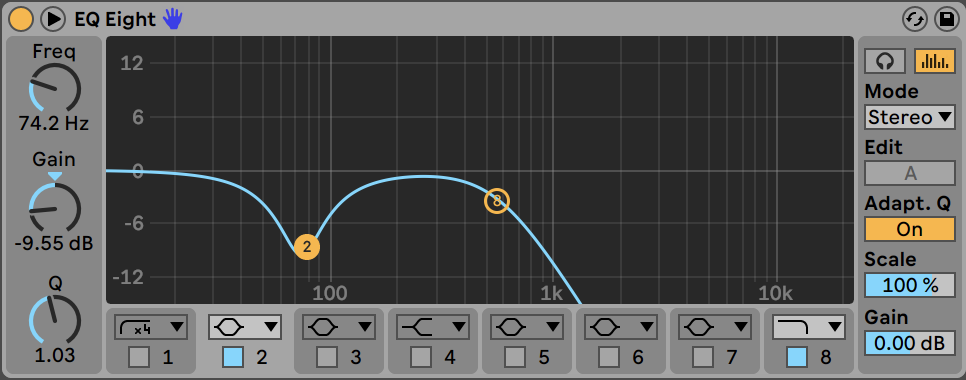
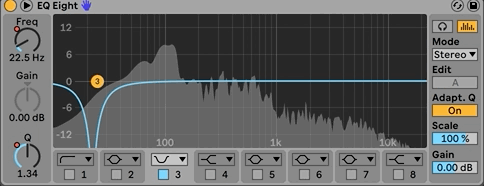
Low Cut Filter
A low cut filter will cut out any frequencies below the selected frequency cutoff point. This is primarily used to remove any unwanted noise in the bass regions. It can also be referred to as a high pass filter.
[divider style=”clear”]
High Cut Filter
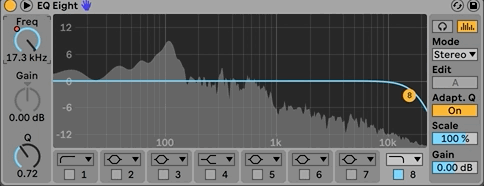
This is the exact opposite of a low pass filter – it cuts out any frequencies higher than the selected frequency cutoff point. It can be used to make a sound more muffled, or automated to create the “nightclub door opening” effect. It can also be referred to as a low pass filter.
[divider style=”clear”]
Band Pass Filter

When a low cut filter is used in combination with a high cut filter, it’s referred to as a bandpass filter. This is because it’s only permitting a certain “band” of frequencies to pass through the equalizer. As mentioned above, this can be handy in making sounds sound more “lo-fi.”
[divider style=”clear”]
Low Shelf Filter
This filter is used to select a broad range of frequencies in the low end and boost or attenuate them. A shelf filter won’t cut out frequencies completely like a cut filter. Instead, it can be used to shape the tone of the sound.
[divider style=”clear”]
High Shelf Filter
The opposite of the low shelf filter, this filter is used to select a broad range of frequencies in the high end, and either boost or attenuate them. This can be a handy filter to add more “air” to a sound.
[divider style=”clear”]
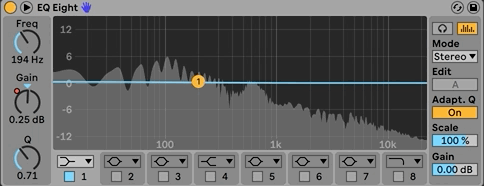
Bell Curve Filter
A bell curve filter is a versatile filter that allows a producer to select any range of frequencies and boost or cut them. With a narrow Q, it can boost or reduce a very specific band of frequencies. With a broad Q, it can boost a wider range of frequencies that might be more musical, for example.
[divider style=”clear”]
Notch Filter
Have a very specific bird in the back of a recording that’s disproportionately loud or annoying? Find the frequency range where it lies and use a notch filter to simply “notch” it out!
[su_divider top=”no” size=”1″]
Special Mentions
Now that you know the basics of equalizers, we wanted to shout out a couple of devices that are based on equalizers, and are incredibly useful.
Auto Filter
Just want to have fun with one filter and use it to add movement to your track? You might be better off using Ableton’s Auto Filter. Besides having a built-in LFO, this device also has an additional filter called a “Morph” filter which allows you to morph between different filter types. See our video breakdown of this handy device below.
[su_youtube url=”https://www.youtube.com/watch?v=NdydQlrf3hA” width=”200″ height=”200″]
[divider style=”clear”]
EQ Follower
One shortfall of EQ’s is that they are static by default. So if you find the fundamental frequency of your instrument and make a boost, the selected frequency range won’t change if you play another note in the instrument. However, here at Beat Lab – we’ve found a developer (Omar Hamid) who’s created a tool that will do exactly that. Watch the video below to learn about & purchase the EQ Follower For Ableton.
[su_youtube url=”https://www.youtube.com/watch?v=mKxKzPFrsJ0″ width=”200″ height=”200″]
[su_divider top=”no” size=”1″]
If you’d like to learn more about music production with Ableton Live with access to online live study groups, find out which of our programs is right for you.
[divider style=”clear”]
[su_button url=”https://beatlabacademy.com/beat-lab-live-online/” style=”ghost” background=”#303133″ color=”#303133″ size=”12″ wide=”yes” center=”yes” radius=”20″ icon_color=”#303133″ class=”custombuttonsyeuda”]Beat Lab Live Online[/su_button]
[su_button url=”https://beatlabacademy.com/online-certification-program/” style=”ghost” background=”#303133″ color=”#303133″ size=”12″ wide=”yes” center=”yes” radius=”20″ icon_color=”#303133″ class=”custombuttonsyeuda”]Beat Lab Online (Self-Pace)[/su_button]
[su_button url=”https://beatlabacademy.com/request-more-info/” style=”ghost” background=”#303133″ color=”#303133″ size=”12″ wide=”yes” center=”yes” radius=”20″ icon_color=”#303133″ class=”custombuttonsyeuda”]Contact Us[/su_button]
Featured Masterclass


0 responses on "EQ Eight Explained - More Than Just Cuts & Boosts"